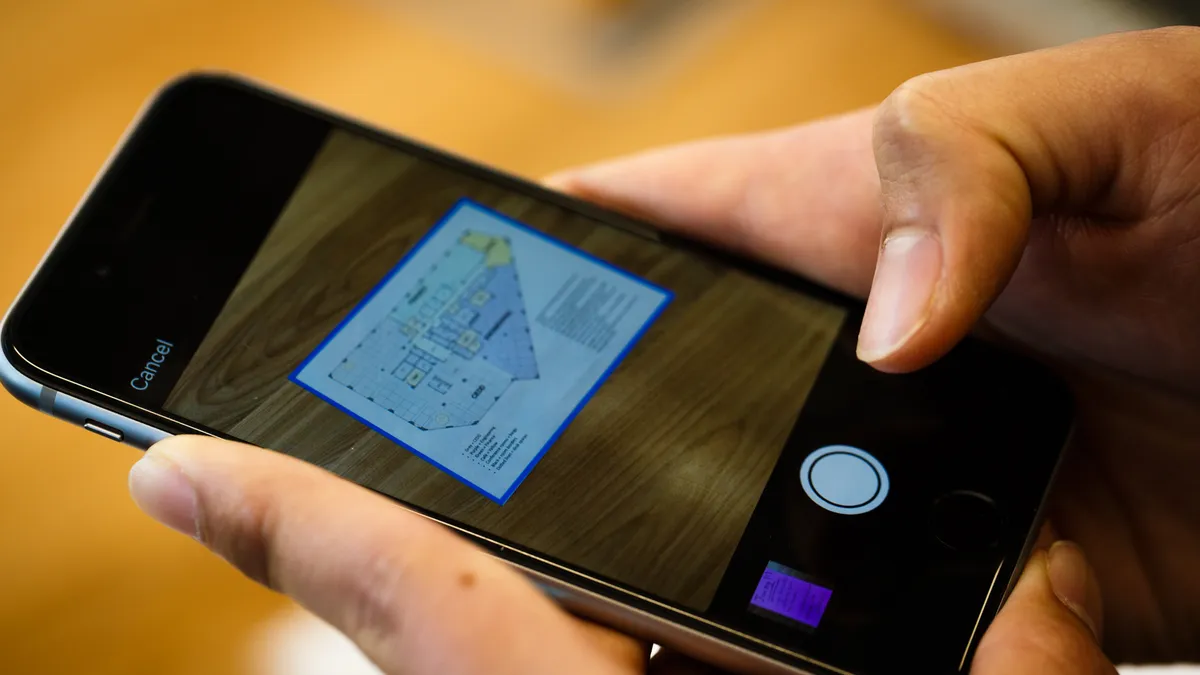
If you’ve got paper tax documents, there’s no need for a dedicated scanner.
How to scan your tax documents with your iPhone or iPad
If you’ve got an iPhone or iPad, you have a couple of ways to scan your documents with your camera, but we’ll be focusing on using the Files app. This method is preferred because the document is saved in Files, which makes it easy to then edit and share to your computer or other devices.
1. To start, open the Files app.
2. Next, tap the three-dot menu icon in the top-right.
3. Hit Scan Documents.
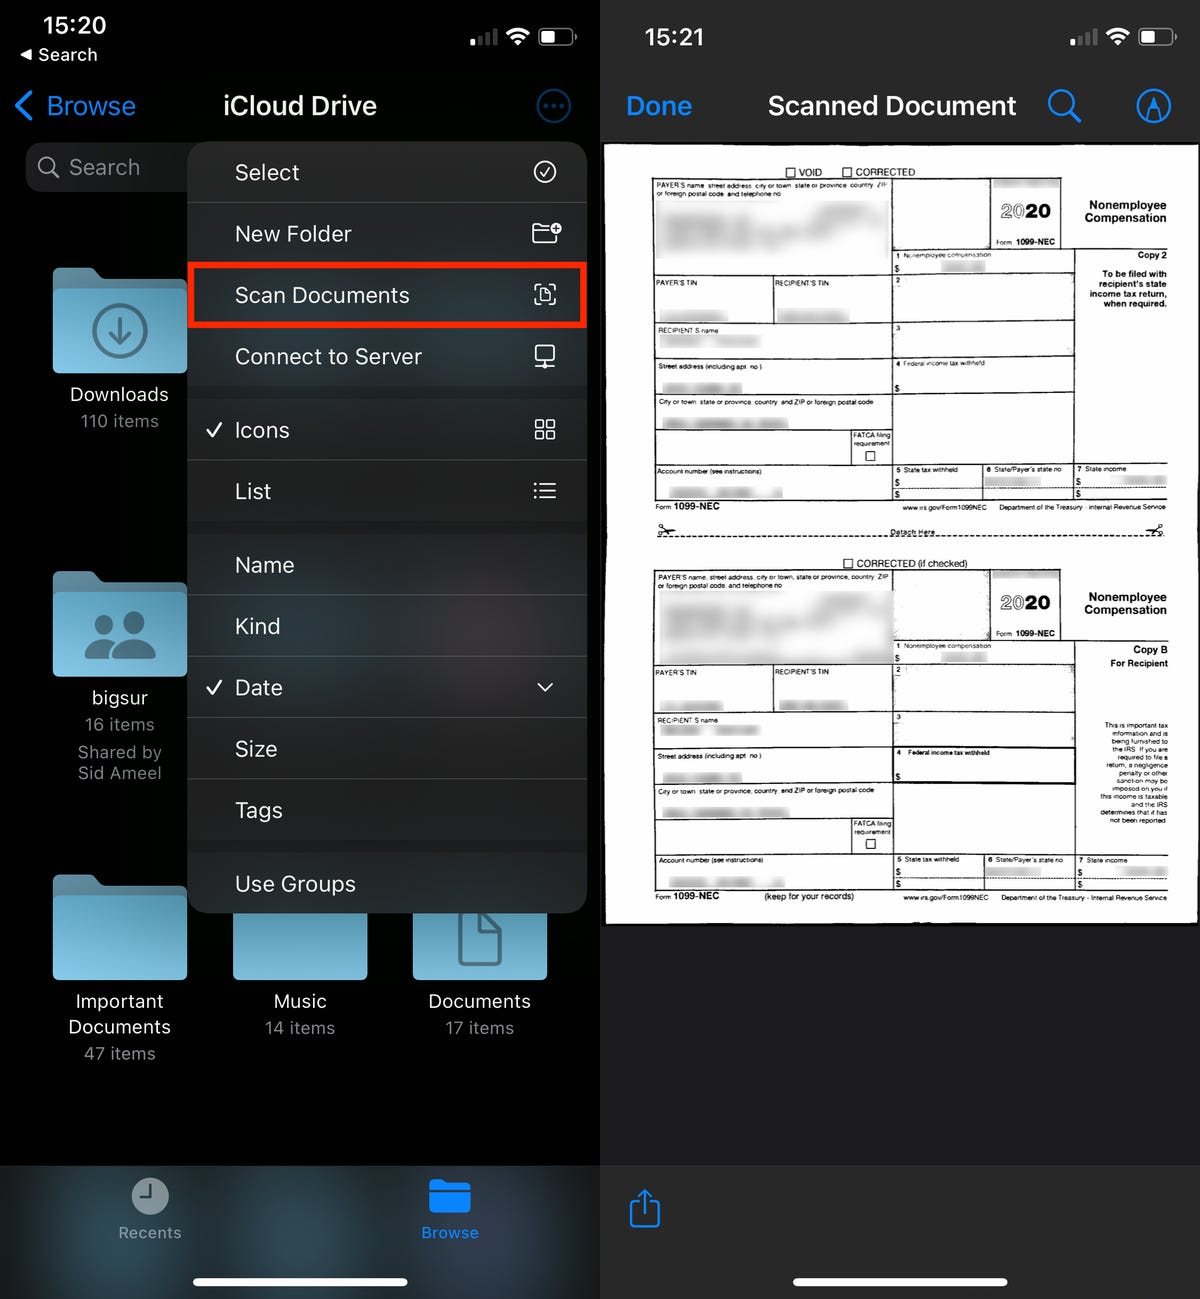
Your camera will then open, and you’ll be asked to position the document in view. The best way to scan your tax document is to place it on a flat surface, like a table or desk, in a well-lit area. Stay away from any surfaces that are white or reflect too much light, or else the camera won’t be able to scan the document properly.
Now, position the phone or tablet so that it’s directly over the document and you’ll see a blue overlay appear on the document, indicating it’s being scanned. If the document is scanned correctly, it’ll automatically be placed into your completed scans, allowing you to scan more documents if you wish.
You can then tap the document preview in the bottom-left to rescan or edit your documents. You can crop them — in case the automatic scanning wasn’t great — and add a filter (such as grayscale) to improve their readability. If you’re happy with the scans, tap Save to store the document as a PDF in the Files app. You can then rename the document or share it via email. If you plan on filing taxes on your mobile device, you can also upload the PDF to any tax apps via the Files app.
How to scan your tax papers with your Android
On Android, there are a few ways to scan documents, but it usually varies slightly depending on the model of the phone. While phones newer than the Pixel 7 and the Galaxy S22 have a built-in document scanners in their Camera apps, other phones do not. So instead, we’ll be scanning documents through the Google Drive app (which technically isn’t built-in, but most Android devices have the Google Drive app preinstalled, so it’s just as good).
1. First, open the Google Drive app.
2. Next, tap the blue + button on the bottom right.
3. Then, tap Scan.
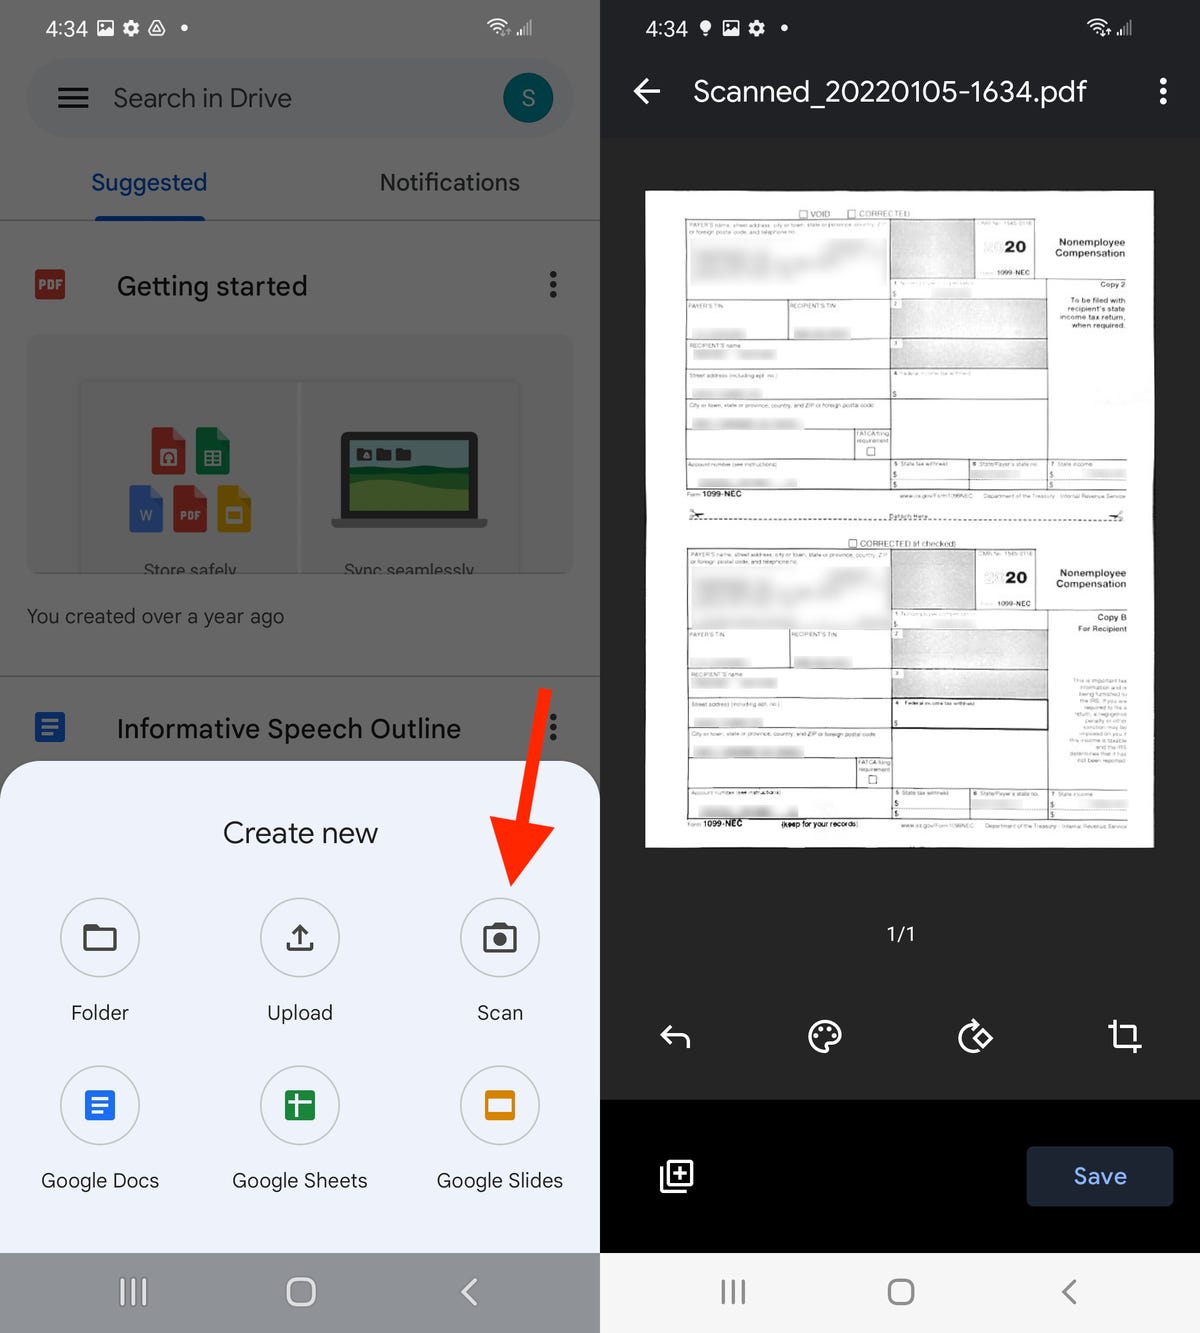
With your physical tax document laid flat on a nonreflective surface, place the camera directly over the paper and position it in the frame. Make sure the tax document is in focus, and then hit the shutter button to take a photo. If the image looks good, tap OK. You should then see an automatically cropped image of your tax document. You can then add a filter to the document (such as black and white), rotate it and edit the borders. If you want to add more documents, tap on the + icon on the bottom-left.
If you’re happy with your scans, hit Save on the bottom right. Then, you can give the document a name, choose an account (in case you have multiple) and select a folder to save the document (as a PDF) in. Once you do that, hit Save again on the bottom-right. With your tax document saved to Google Drive, you can add comments, search through it via keywords and of course share it via email or directly to any tax apps you might have on your Android.
Now that it’s tax season, you might have questions. If you want to learn more, check out all the tax breaks for homeowners and learn who gets to claim the child tax credit this year.

