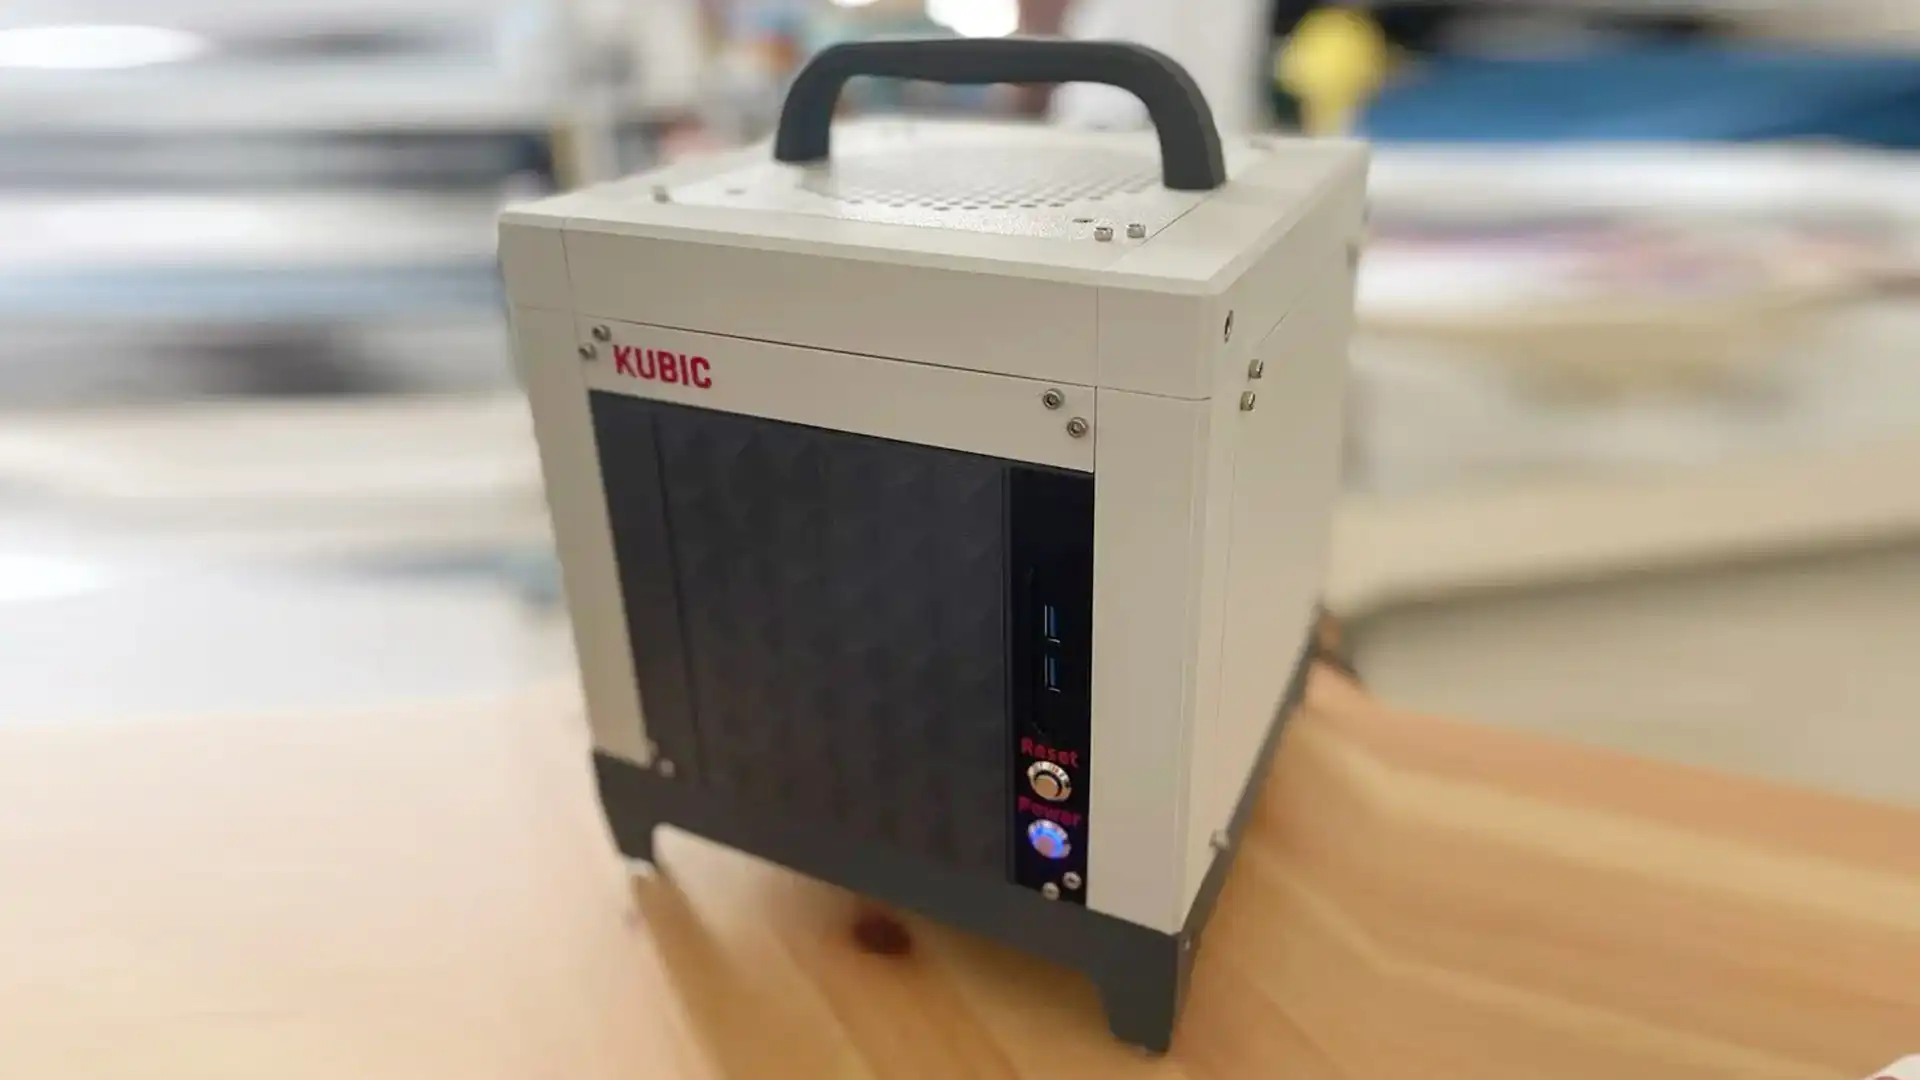
The Gamecube-inspired Kubic can accomodate standard ITX parts, including a 2-slot discrete GPU.
I’ve never built a PC in anything smaller than MicroATX. But even as someone who can’t live without a few extra PCIE slots, I must admit that those Mini-ITX designs have some serious aesthetic appeal. If you happen to have even a budget 3D printer, you don’t need to sojourn to your nearest MicroCenter to see one, either — you can whip up a free one at home.
The Kubic is a small form factor PC case compatible with Mini-ITX motherboards, with a roughly kubic cubic layout and some NES vibes. At least that’s the impression I get from creator WhoIsLudwig’s choice of colors and finish on his completed files. Considering that it has a cute little handle up top, maybe the Gamecube is a better comparison. It was spotted by Tom’s Hardware.
This isn’t the first case created with a 3D printer, but the Kubic has no single piece bigger than 170x170mm. That means that you should be able to get all the necessary pieces on even a small budget printer such as the Bambu A1. And despite its diminutive looks, it can handle a discrete GPU — double slot and maximum 220mm long. That means with the right hardware you can get some serious power out of this cute little thing.
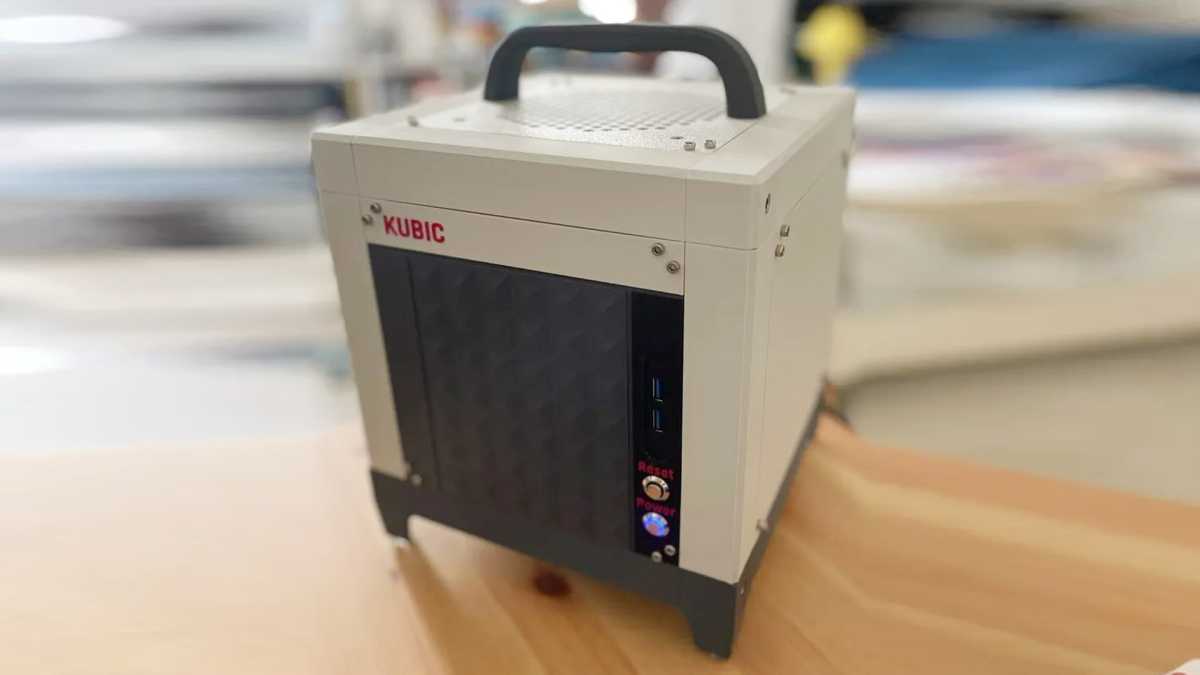
But you might not want to build this as an overclocked gaming rig. The entire thing will be cooled by a single 140mm fan mounted on the top, so a powerful CPU combined with a one-fan all-in-one liquid cooling setup will push a lot of hot air past the radiator. WhoIsLudwig includes three alternatives for the front plate, bare, USB, or audio jack.
To assemble the plastic parts once they’re done, you’ll need a bunch of screws and brass inserts, plus a couple of electrical switches for the power buttons and a USB header if you want those front-facing ports. And, of course, a few hand tools and a soldering iron. Plus all your PC parts and a 140mm fan, assuming you’ll want to get a final build in there. According to the step-by-step instructions, the build uses 1.5 kilograms (3.3 pounds) of 3D printer filament.