Although the Raspberry Pi 5 has a PCIe interface, it doesn’t have a slot for a PCIe SSD. There’s now a whole range of plug-in boards (HATs = Hardware Attached on Top) for retrofitting SSDs. They differ in whether they’re mounted above or below the main board of the Raspberry Pi, whether they’re compatible with the fan and how many SSDs they can accommodate.
Smaller plug-on boards such as the recently introduced M.2 HAT+ from the Raspberry Pi Foundation are unable to cope with the long 2280 SSDs. There are even HATs that can accommodate two or four SSDs. However, these variants, which are primarily intended for NAS use, are not bootable.
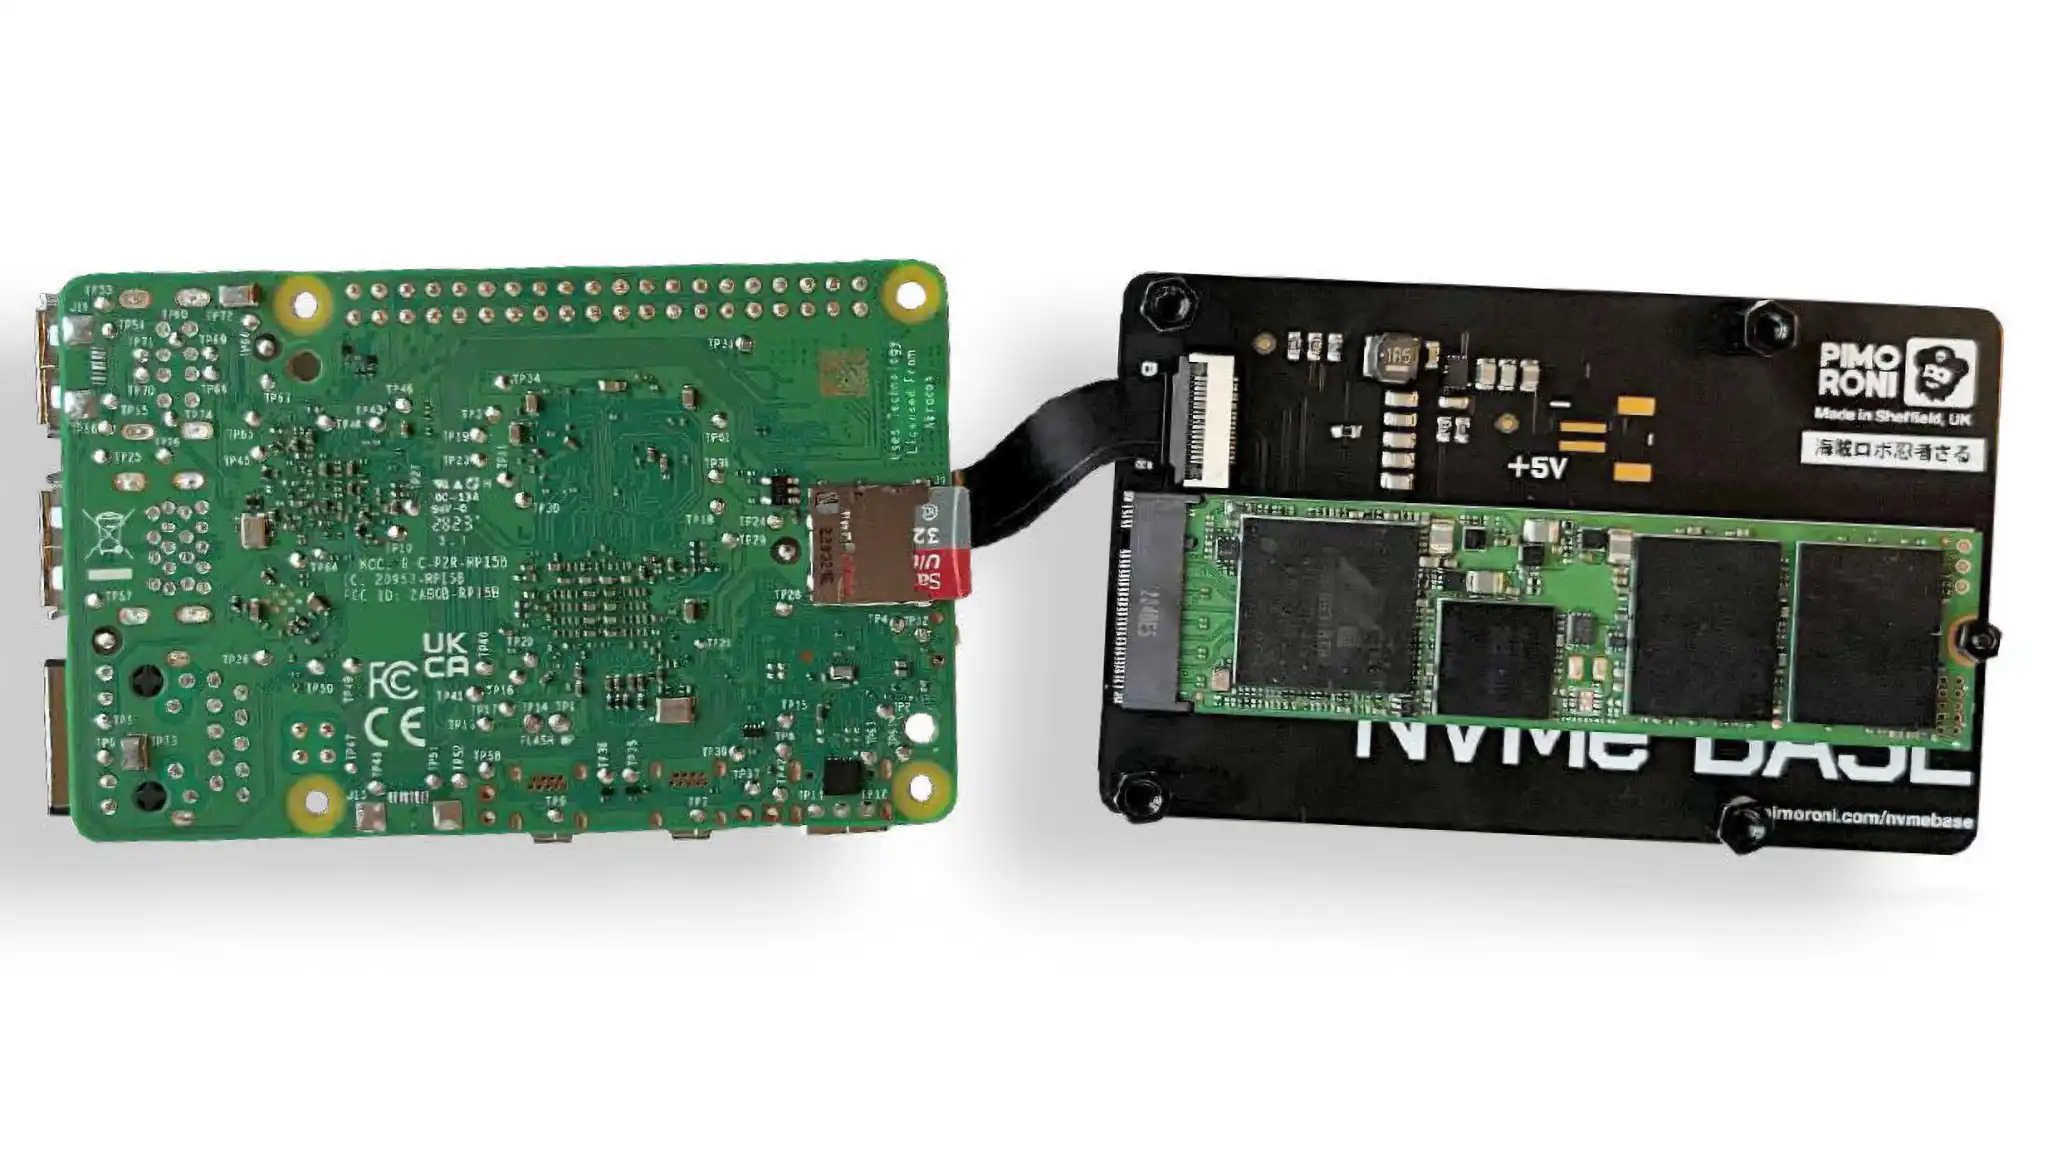
NVMe Base from Pimoroni
For this article, we tested the NVMe Base model from the British company Pimoroni.
The expansion board is supplied with a tiny cable and a lot of screws. This makes assembly a little fiddly, but not particularly difficult. You’ll find excellent instructions in the YouTube video below.
Make sure that you use a PCIe SSD and not an old M2 SATA SSD! Nothing will work with that! After you’ve screwed everything together, restart the Raspberry Pi (still from the SD card).
Use lsblk in the terminal to make sure that the SSD has been recognized. It’s crucial that lsblk reports one or more lines with the device name “nmve0n1.”
Clone Raspberry Pi OS and boot from the SSD
Now you need to transfer the existing Raspberry Pi OS installation from the SD card to the SSD. To do this, start the SD Card Copier accessory program while the system is running and select the SD card as the data source and the SSD as the destination.
Copying the file system while the system is running is a little tricky and can lead to errors in unfavorable cases. You should not actively use the Raspberry Pi during this time!
If you want to be on the safe side, you can take the diversions via an image backup. In our case, the direct copying process was successful in just a few minutes. The copy tool automatically adjusts the size of the partitions and file systems to the size of the SSD.
sudo raspi-configThe last step is to change the boot mode so that the Raspberry Pi now uses the SSD as the boot medium instead of the SD card. To do this in the terminal, select Advanced Options > Boot Order > NVMe/USB Boot.
Even if everything works, the next boot process is a little disappointing at first. The Raspberry Pi takes so long to recognize the SSD that the time until the desktop appears is not shortened, but on the contrary is extended by a few seconds (in our case about 26 seconds, with SD card only 20 seconds).
If you’re unsure whether the SSD is being used, run lsblk again. The mount point for the root directory “/” must now be at the NVMe device.
You’ll notice how much speed the SSD provides most clearly when starting large programs (Firefox, Chromium, Gimp), which are now noticeably faster. Major updates (sudo apt full-upgrade) are also much faster.
Raspberry Pi Foundation
The benchmark tests
Is the higher speed just imagination or does the Raspberry Pi actually run faster? This question is answered by I/O benchmark tests with the Pi Benchmark, which can be obtained with wget:
https://raw.githubusercontent.com/TheRemote/PiBenchmarks/master/Storage.shAlways take a look at downloaded scripts with an editor before executing them with sudo:
sudo bash Storage.shAs you can see from the table opposite, we ran the test four times, with a micro SD card, with a SATA SSD (Samsung 840) on the USB3 port, with a PCIe SSD (Hynix 512 GB PCIe Gen 3 HFS512GD9TNG-62A0A), and with the same PCIe SSD and PCIe Gen 3 (details below). The differences are dramatic.
It’s important to note that these are synthetic tests! In real world operation, the Raspberry Pi feels noticeably faster, but not to the extent that the results in the table suggest.
A tip on PCIe Gen 3! By default, the Raspberry uses PCIe Gen 2. By adding two lines of code to the /boot/firmware/config.txt file, you can activate the significantly faster PCI Gen 3 mode:

dtparam=pciex1
dtparam=pciex1_gen=3
The benchmark results prove that this tuning measure actually still provides a measurable increase in performance. However, this is no longer noticeable in normal everyday desktop use. Only if you intend to use the device as a (database) server is the setting worthwhile.
The question remains… is such tuning risky? The Raspberry Pi Foundation must have had a reason for not activating PCI Gen 3 by default. In our tests over the course of several months, no problems were encountered. The kernel protocol with dmesg did not deliver any worrying messages either.
Conclusion and evaluation
It’s undoubtedly cool to use the Raspberry Pi with a fast SSD. However, this is definitely not necessary for DIY projects and is less noticeable on the desktop than expected. Only when the device is intended to work as a NAS-like data server does the SSD speed up all I/O processes enormously.
It would be even better if the Raspberry Pi had a PCIe slot in future, so that at least short SSDs could be used without an expansion board.