Launched way back in April 2004, Gmail has now been around for over 20 years — and it boasts lots of great features that many users, for whatever reason, still aren’t taking advantage of.
While Gmail is fundamentally built for the sending and receiving of email, its various features can make that entire process work better for you. If you aren’t using the following Gmail features, consider starting today. You might be surprised by how helpful they can be.
Smart compose
Smart Compose is designed to help you write emails faster by writing your emails for you, saving you the hassle of wasting time or brainpower. The feature uses machine learning to predict what you intend to type, with Gmail offering real-time suggestions as you compose an email.
Dave Parrack / IDG
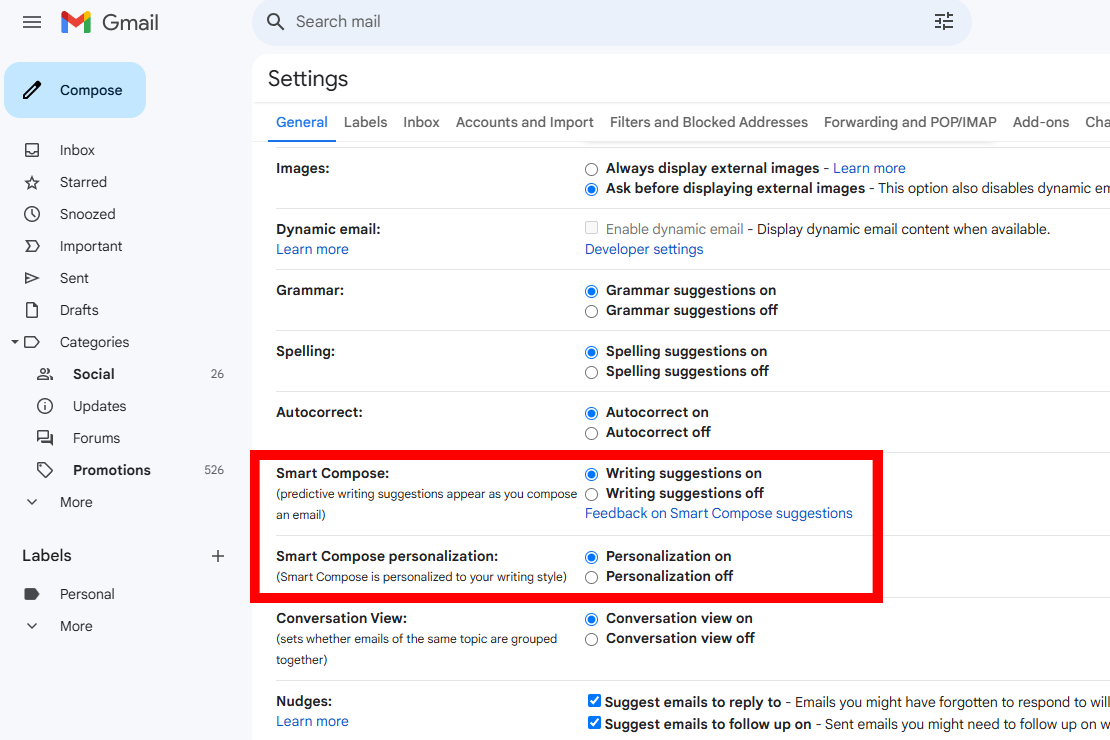
Smart Compose is turned on by default unless you’ve opted out of smart features and personalization. However, it’s easy to toggle Smart Compose by navigating to Settings > See all settings, then scrolling down the General tab until you see Smart Compose.
The standard Smart Compose feature offers predictive writing suggestions as you type, but you can also enable Smart Compose Personalization to have these real-time suggestions personalized to your own writing style based on all the emails in your Gmail account.
Schedule send
Are you the type to write your emails ahead of time? If so, you probably draft them up then let them sit in Drafts until you’re ready to send. But this can be risky because you might forget about it… and is there anything more frustrating than thinking you sent someone that email only to hear back that you never did? Ugh!
Dave Parrack / IDG
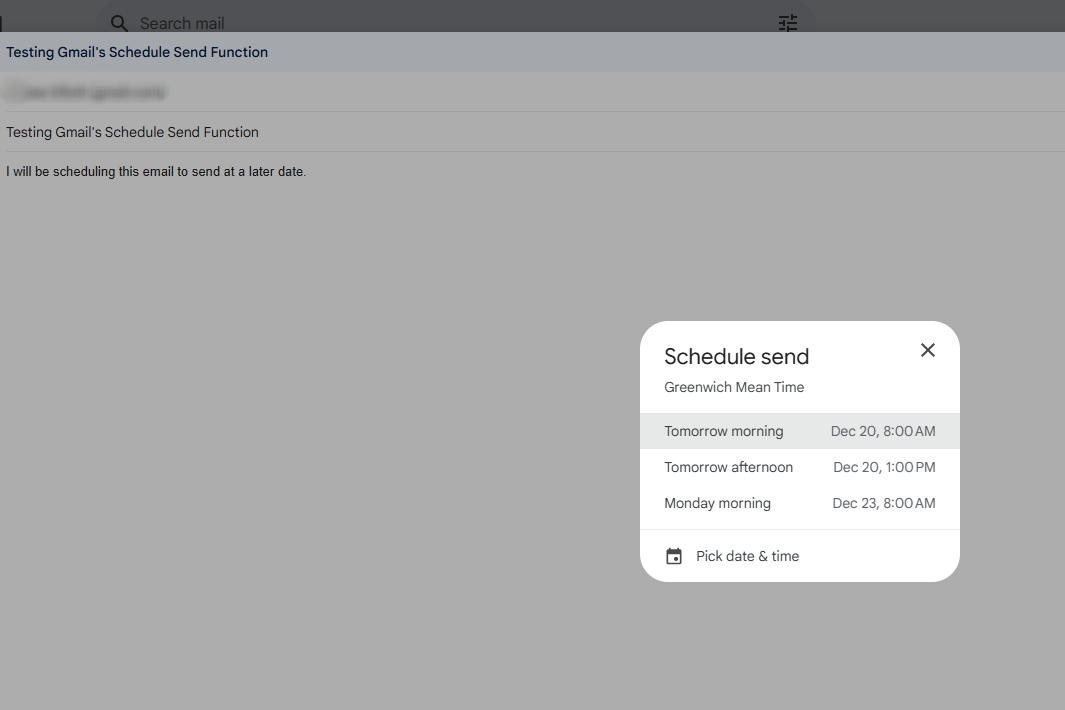
That’s why you need to be using Gmail’s Schedule Send feature. When your email is typed up and ready to go, you don’t have to send it right away — you can instead set a date and time for the send. To do this, instead of clicking Send like usual, click the drop-down arrow next to Send and then click Schedule Send.
By default, you can opt for “tomorrow morning,” “tomorrow afternoon,” or “Monday morning” (which is great if you’re typing up a work-related email on the weekend). But you can also Pick date & time to select any specific date and time for sending it out. Never forget again!
Undo send
Gmail’s Undo Send feature is pretty self-explanatory. It gives you a grace period after sending an email to change your mind, allowing you to cancel the send so you can make further changes, or postpone sending to a later time, or just withhold sending altogether.
Undo Send is really useful when you accidentally send in the middle of composing the email, or if you forgot to attach those files, or if you spot a typo after the fact, or you mistakenly CC’d instead of BCC’d, etc.
Dave Parrack / IDG
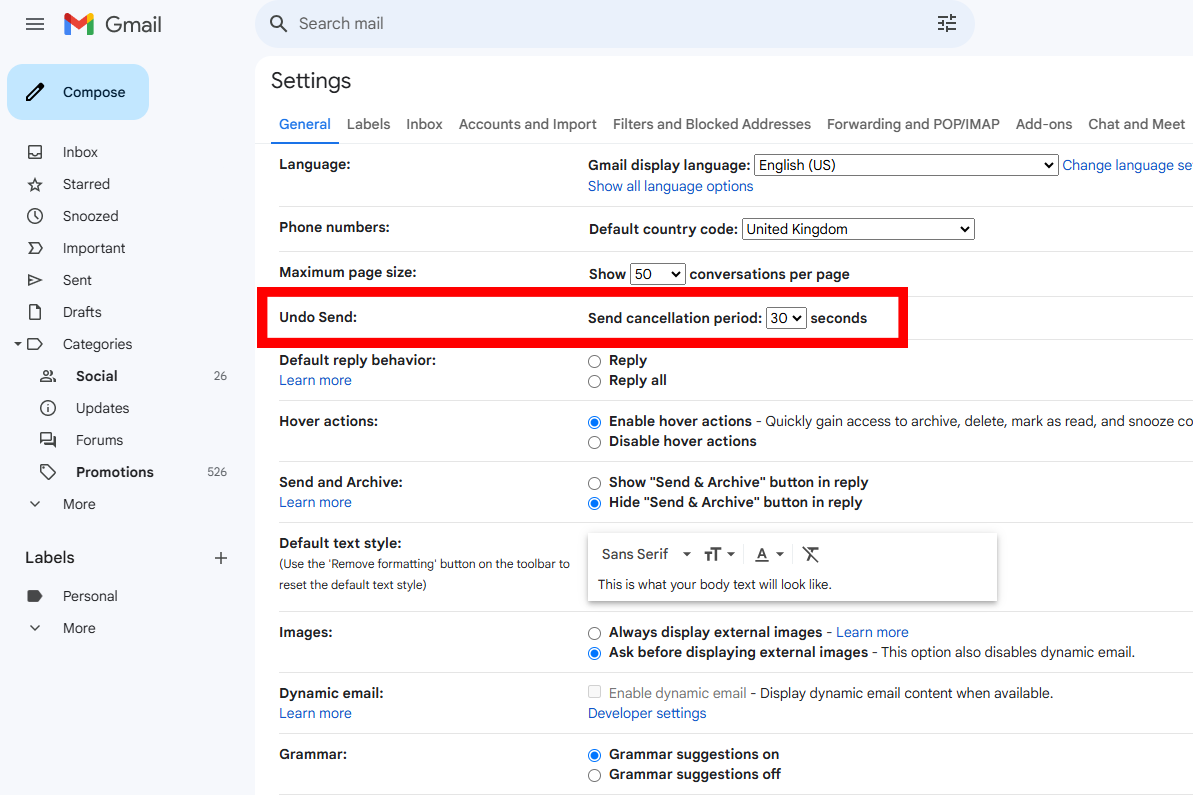
Undo Send is enabled by default, but you can change the duration of the grace period for undoing the sending of an email.
Navigate to Settings > See all settings, then scroll down the General tab until you find Undo Send. You can then set the timer to anywhere from 5 seconds to 30 seconds. I recommend setting it to 30 seconds because there’s really zero downside to having that extra time.
To undo an email after sending it, look for the Message Sent notification in the bottom-left of your screen and click Undo. If you’re quick enough, the email will revert back to Draft status without ever actually having been sent to the recipient’s inbox.
Search operators
While the basic search function in Gmail is as easy as typing what you’re looking for into the search box, the results aren’t always that great.
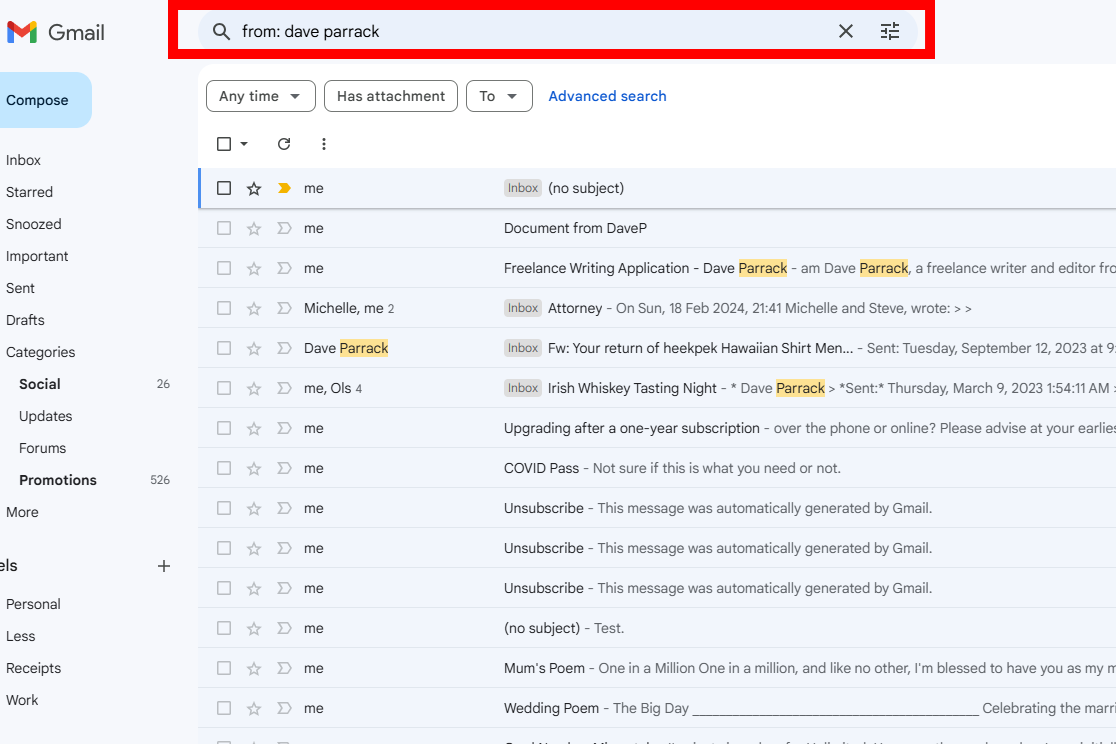
If you’re tired of irrelevant or excessive results when searching through your entire Gmail archive, start using Gmail’s search operators to better filter the results. This is especially useful if you have tons of emails filling up your inbox and it feels like searching for a needle in a haystack any time you have to rummage through for a particular email.
Dave Parrack / IDG
There are too many Gmail search operators to list them all here, but some of my most used ones include from: (used to filter emails to only those that were send from a specific person) and subject: (used to filter the search by email subject lines and ignore body content).
I recommend checking out our article on essential Gmail search operators worth knowing. To go even further, you can see a full list of all Gmail search operators on this Gmail support page
Snooze emails
Snoozing an email is a bit like snoozing your alarm clock in the morning — Gmail temporarily removes the snoozed email from your inbox for however long you decide to snooze it.
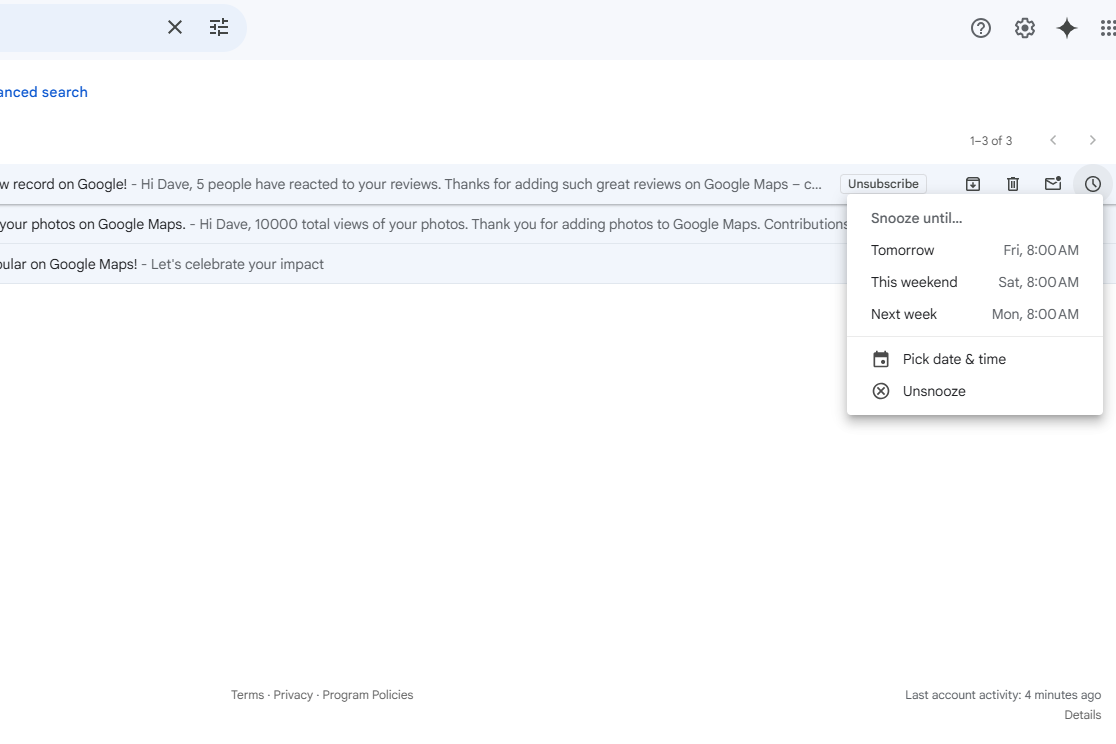
By default, you can snooze an email until “tomorrow,” “this weekend,” or “next week.” But you can also pick and choose whatever date and time you want, allowing you to procrastinate to your heart’s content. When the snooze expires, the email pops right back into your inbox.
Dave Parrack / IDG
To snooze an email in Gmail, hover over the email in question and click the Snooze icon on the right-hand side of the options. You’ll see a bunch of default time periods you can snooze the email for, but if none quite work for you, click Pick date & time to set your own. You can also snooze multiple emails at once by selecting them all and doing the same.
After snoozing emails, you can then view all of your snoozed emails under Snoozed in the left panel, and you can unsnooze any emails early if you want to deal with them ahead of schedule.
Email templates
If you find yourself sending the same email over and over — or at least similar emails that contain very similar structure and content — then you should absolute utilize Gmail’s Email Templates feature.
As the name suggests, Email Templates allow you to create and save different templates, which you can then use in the future to instantly start with a baseline email that you can edit, instead of having to draft your emails from scratch every single time.
Dave Parrack / IDG
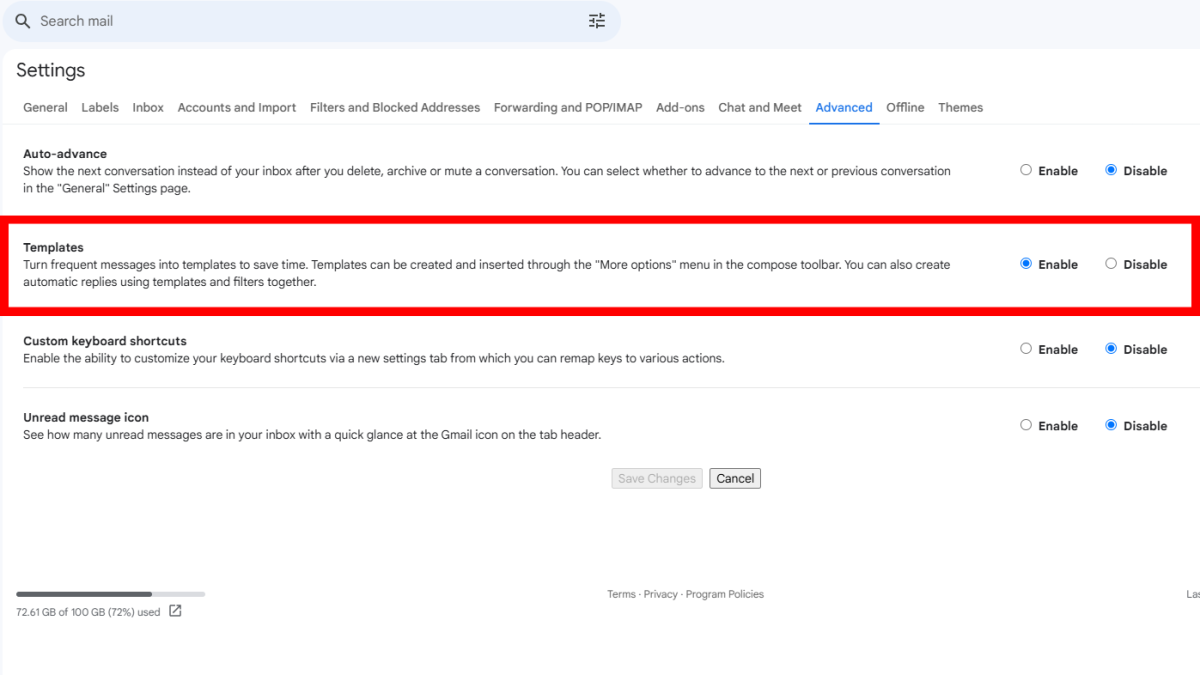
To use templates, navigate to Settings > See all settings, then scroll across to the Advanced tab and find Templates. Click Enable, then Save Changes. Once Gmail has reloaded, you can create a template.
To create a template in Gmail, compose an email as normal, but instead of sending it, click the three-dot menu > Templates > Save draft as template. Then, the next time you want to send a similar email, just click the three-dot menu > Templates > Insert template.
Spelling and grammar suggestions
Correct spelling and grammar in emails is important at all times, but it’s especially important when you’re emailing someone in a professional capacity. Whether to your boss or a client, you want them to have the best impression of you with every email you send.
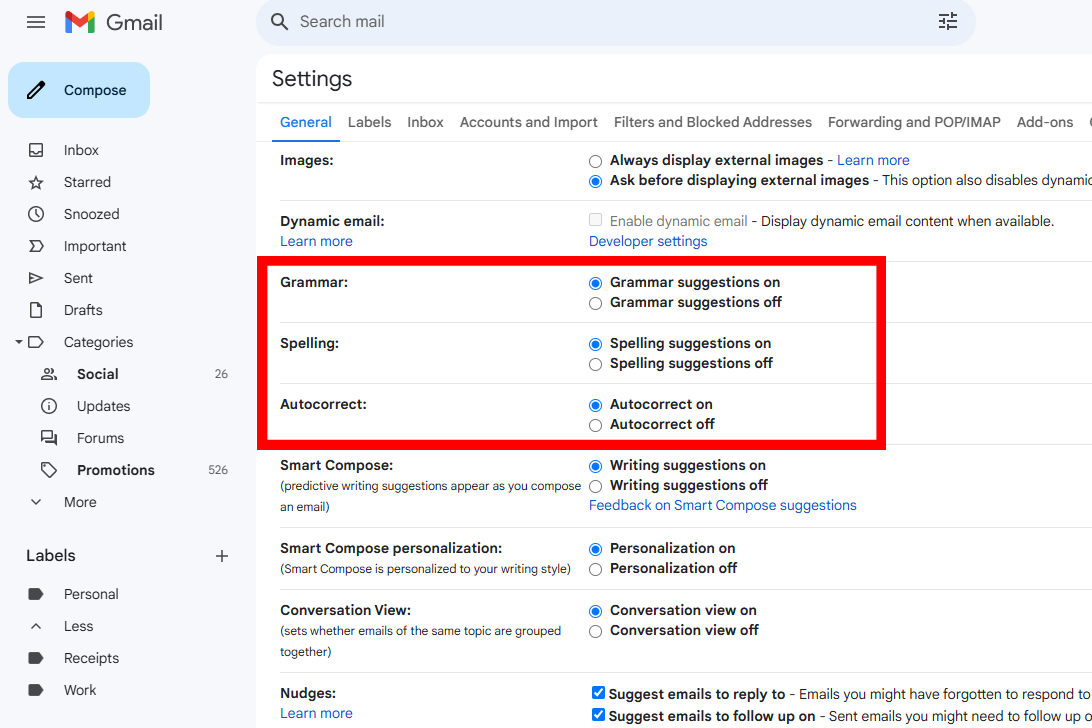
Thankfully, Gmail offers autocorrect for both, as well as real-time spelling and grammar suggestions that come in handy when autocorrect seems too much and you want to remain in control of your writing.
Dave Parrack / IDG
To have Gmail check your spelling and grammar as you write, navigate to Settings > See all settings. Scroll down the General tab until you see the option to toggle grammar suggestions, spelling suggestions, and autocorrect. Experiment and find what combination works for you.
Inbox categories, labels, and filters
If you send and receive a lot of emails, Gmail’s basic organization isn’t enough to keep you sorted and tidy — at least not without a lot of manual effort on your part. Fortunately, Gmail has advanced organization features that can help automate a lot of that and keep you straight.
For starters, Gmail’s inbox categories exist to automatically sort your email by intent. These inbox categories include Social, Promotions, and Spam, and Gmail automatically processes incoming emails and sorts them into these categories for your convenience.
Beyond those categories, you also have labels. A label is like a custom tag that lets you manually categorize emails however you want. Each label is like a folder, except you can mark an email with as many different labels as you want. Labels are navigable in the left-side panel, and labeling makes it easy to browse and find emails by type. For example, you might have labels for receipts, bills, work projects, different hobbies, etc.
Dave Parrack / IDG
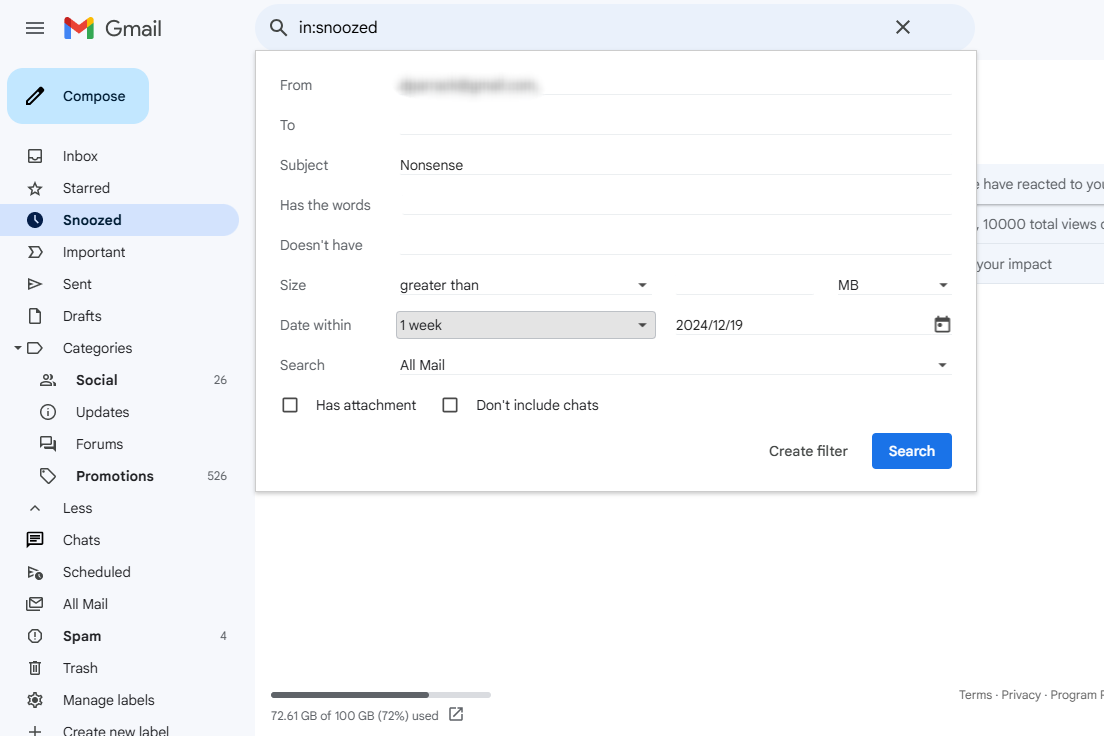
One step further, you have filters. A filter is a custom rule you can create, which automatically does things to emails as they enter your inbox. To create a filter, click Show search options to the right of the search box, enter your search criteria, and then click Create filter.
For example, you might create a filter that automatically applies a certain label to all emails with a certain word in the subject line, or you can automatically forward emails to a different inbox if they come from a specific domain address.
Confidential mode
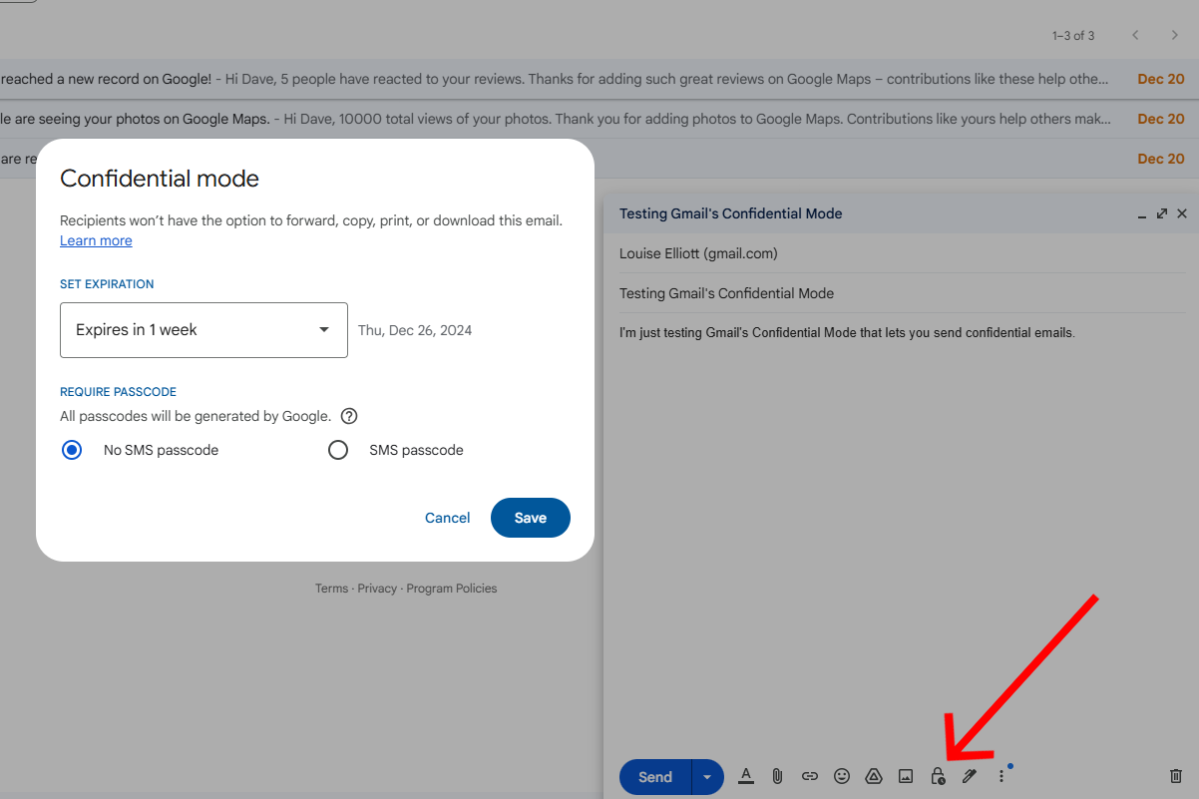
Did you know Gmail has a confidential mode? It’s one of the best ways to make Gmail more secure, designed to protect your sensitive information by limiting what recipients can do with your email.
When an email is sent via confidential mode, you can set it to have an expiration date and whether it should require an SMS passcode to open. Confidential emails can’t be forwarded, copied, printed, or downloaded by recipients. You can also revoke access to the email later.
Dave Parrack / IDG
To send a confidential email, when composing a message, click the Lock icon to toggle confidential mode. You’ll then be able to set the above mentioned features for that email. Safe!
Keyboard shortcuts
While Gmail is, by default, extremely user-friendly, you can end up wasting a lot of time if you only navigate using your mouse cursor. The more time you spend reading, writing, and organizing your email, the more you can benefit from the use of keyboard shortcuts.
You have to enable keyboard shortcuts in Gmail, but once you’ve done so — and after you’ve learned the useful ones enough that they become second nature — Gmail will become so much easier to use and you’ll end up saving a lot more time than you thought possible.
Dave Parrack / IDG
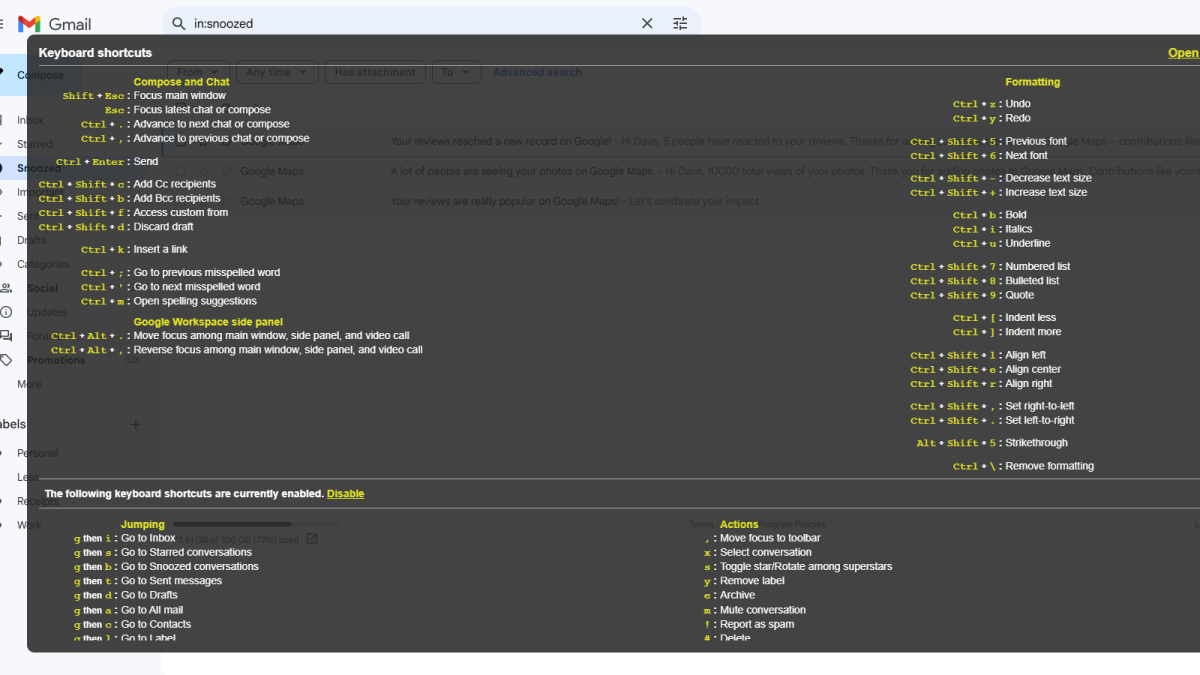
To enable keyboard shortcuts in Gmail, navigate to Settings > See all settings, then scroll down the General tab until you see the option to toggle Keyboard Shortcuts.
Gmail offers a large number of keyboard shortcuts out of the box, and it may take some time to wrap your head around all of them. Once keyboard shortcuts are enabled, you can always see a full list of them by typing ? while Gmail is open.
If you aren’t happy with the keyboard shortcuts as is, you can customize them however you want. Navigate to Settings > See all settings, then scroll down the Advanced tab and enable Custom Keyboard Shortcuts. After that, you should see a Keyboard Shortcuts tab where you can customize Gmail’s keyboard shortcuts to your heart’s content.

