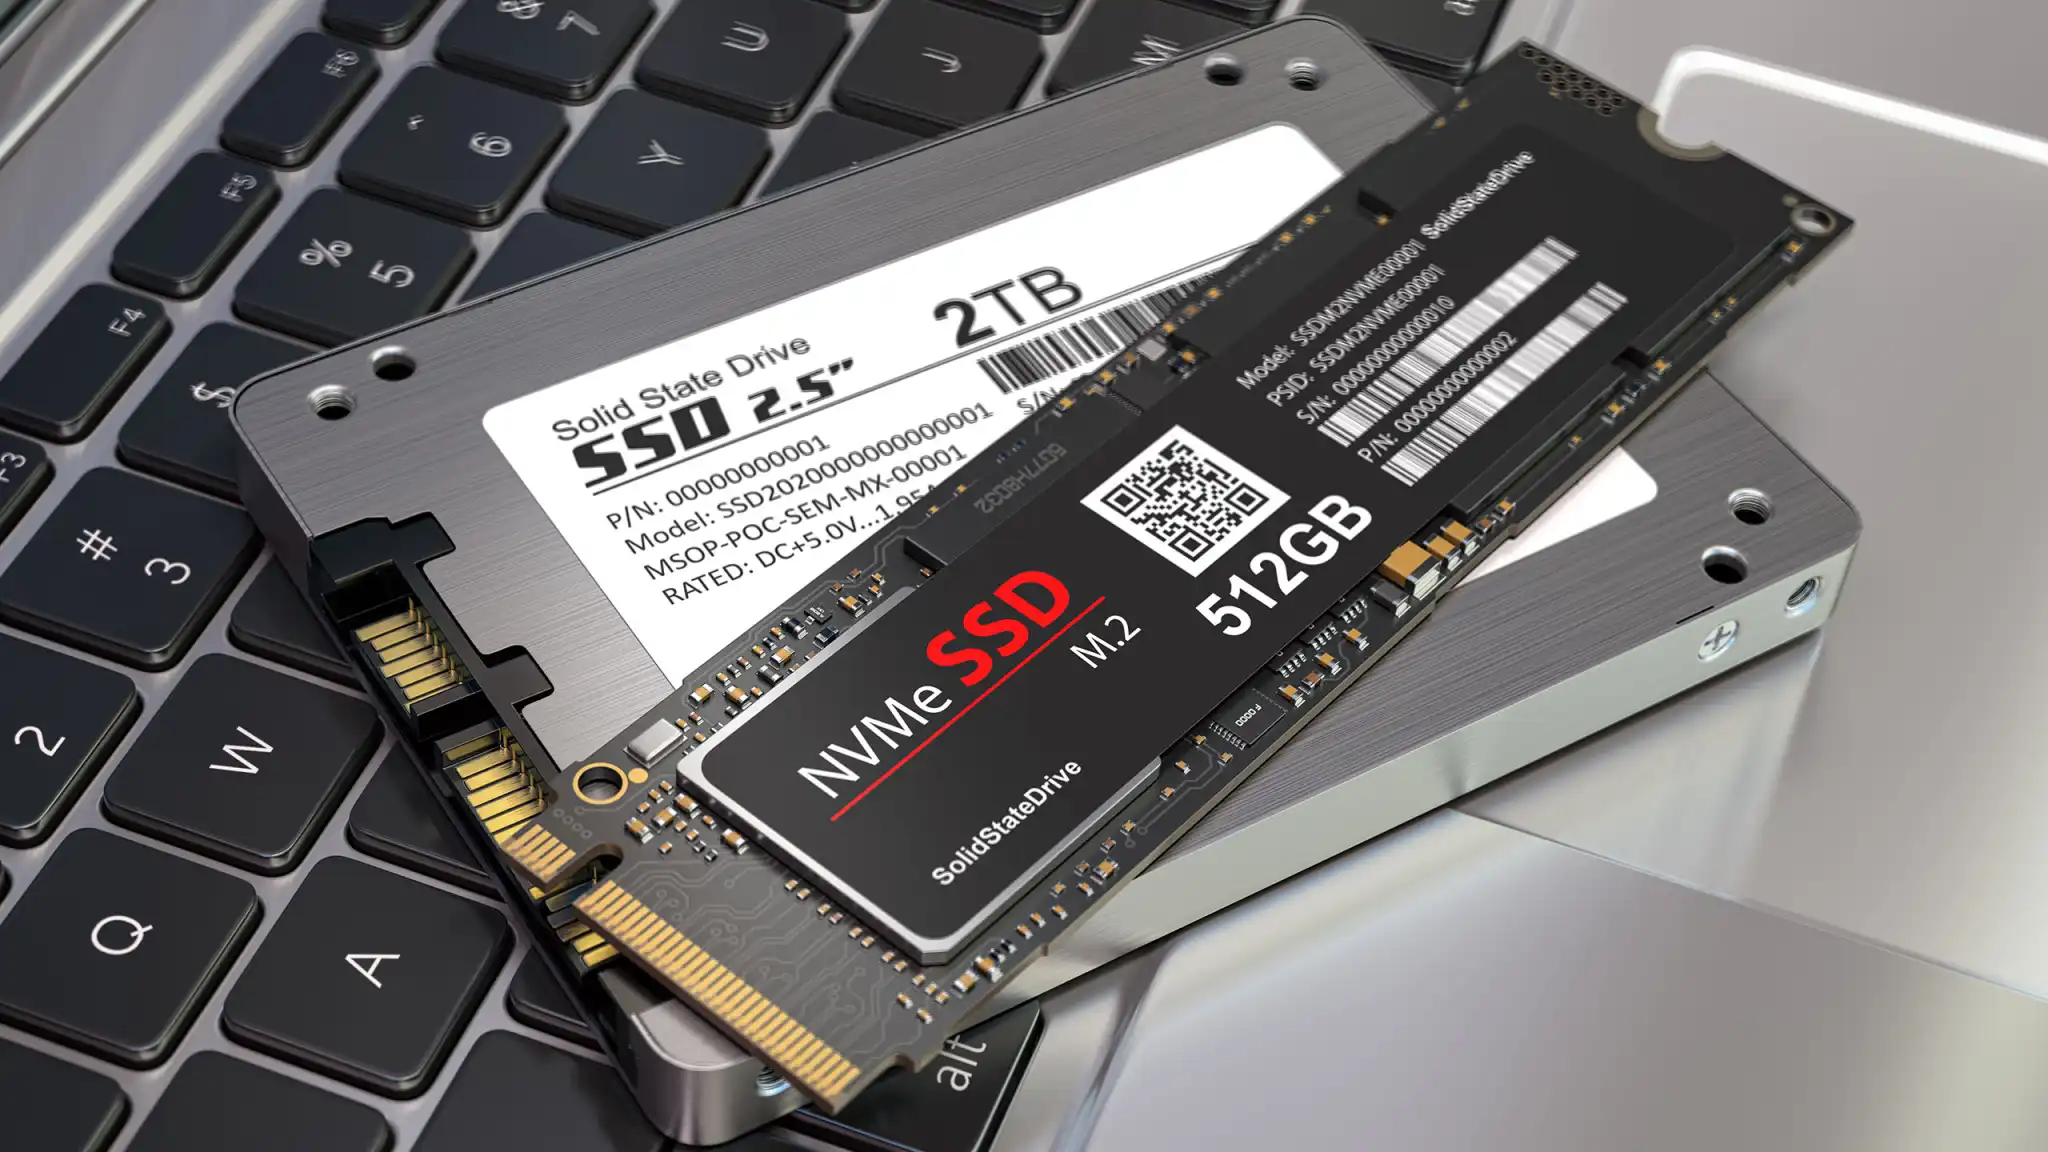
Use these tips and tweaks to wring every last drop of performance out of your SSD.
SSDs are now the most common type of hard drive in both laptops and desktop PCs. They’re compact, they’re quite, and they outperform traditional hard drives by a mile — but they also tend to slow down over time (and eventually stop working altogether).
But it’s not as bad as it sounds. There are several things you can do to keep your SSD going at tip-top performance. Keep reading to see if your SSD has slowed down and what you can do to speed it back up.
Check if your SSD is slowing down
SSDs can underperform for a few reasons: the storage space on the drive is running out, incorrect Windows settings are interfering, or maybe your SSD’s settings just need to be tweaked.
To discern whether the apparent slowdown is real or just all in your head, you can use the free CrystalDiskMark benchmark app to get a clear picture of your current drive speed. (You might also want to do this once a year to catch any slowdowns before you even notice them.)
CrystalDiskMark can show you the sequential read and write rates of your drive, which you can then compare with the manufacturer’s specifications. If your drive is operating noticeably slower, then you should move on to the tips below. Otherwise, you’re good!
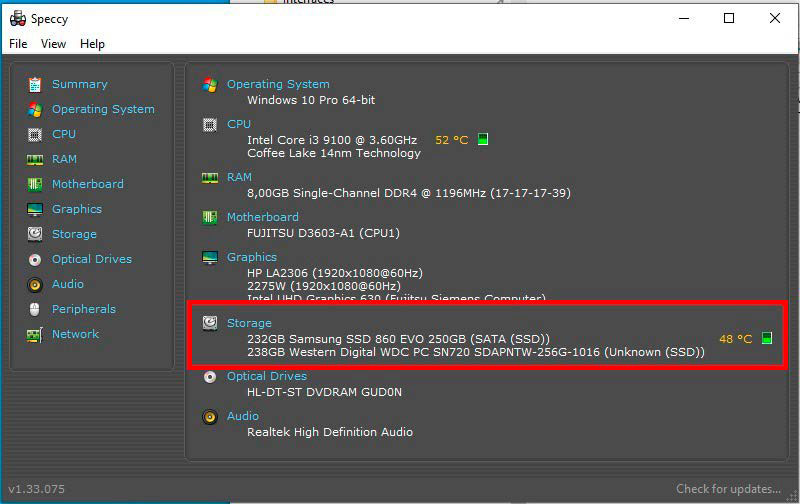
With Speccy, you can find the details on the Summary page under the Storage section. You can also see some other bits of info, like interfaces, operating times, and functional status.
1. Update the firmware
It’s common knowledge that Windows should be regularly updated to fix issues, increase security, and add new features. The same is true for SSDs: drive manufacturers provide firmware updates (albeit at a much lower frequency than you get Windows updates).
Firmware updates are primarily for correcting errors like an incorrectly calculated SSD service life, but they can also lead to performance improvements. We advise installing firmware updates when available.
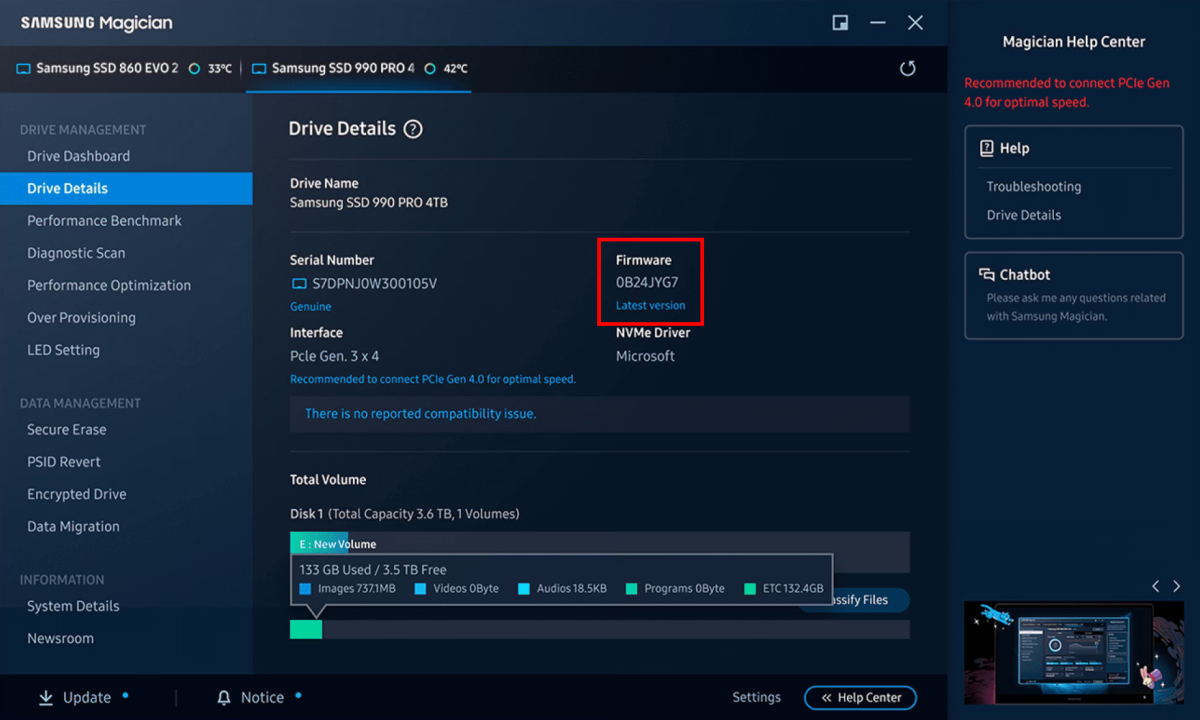
Samsung
The problem is that you won’t be automatically informed when a firmware update is available for your SSD model, meaning you have to be proactive about it. The most convenient way to check is to use your SSD manufacturer’s own support tool, such as Crucial Storage Executive, Kingston SSD Manager, or Samsung Magician.
You should also be able to install the firmware update straight from within the SSD support tool. The update process usually only takes a few minutes and ends when the computer shuts down. (We recommend backing up your data before starting the process.)
2. Increase the DRAM cache
SSDs differ in their flash type. Most models are equipped with either TLC (Triple Level Cell) or QLC (Quadruple Level Cell), with the former storing three bits per cell and the latter storing four bits per cell.
This is called storage density, and higher storage densities are more favorable to production costs — but the downside is that higher storage densities negatively impact the operating speeds of individual cells. Manufacturers can partially compensate for this using NAND stacking technology, but the compensation only goes so far.
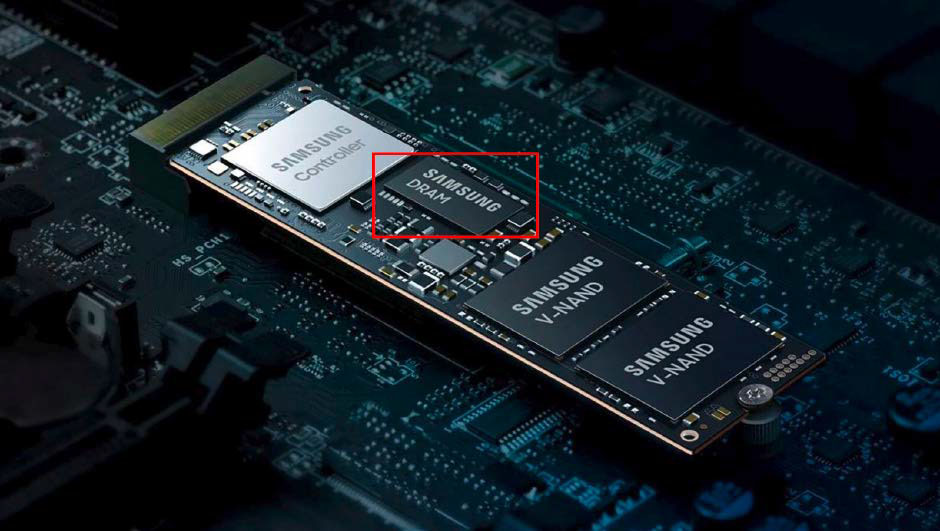
That’s why the controller chip plays an important role. It can minimize the speed deficits of relatively slow flash cells through clever control. Furthermore, in some SSD models, it’s supported by an extra component called the DRAM cache (Dynamic Random Access Memory), which stores the management data and mapping table.
IDG
As such, DRAM memory is much faster than NAND flash. It speeds up access time, which in turn boosts the data transfer rate.
Without a DRAM cache, SSDs must store their data mappings directly in the NAND cells. Not only does this slow down the overall speed of access, but it also increases wear and tear on the memory cells. That’s why these SSDs are cheaper to buy and come with lesser warranties.
You should be able to tell from the technical specs whether an SSD has a DRAM module or not, but it isn’t always indicated. In that case, you can use TechPowerUp’s SSD Specs Database to check.
3. Schedule routine optimizations
With flash-based storage, drives must be regularly optimized to maintain performance in the long run.
SSDs that are too close to full capacity can’t operate at peak performance, so they need to be periodically cleaned up. The problem is, SSDs aren’t like HDDs — they can’t simply overwrite data that’s no longer needed. Instead, they must go through a cleanup cycle to free up blocks.
This “garbage collection” happens in the background and is triggered by the operating system’s trim command. Trimming ensures peak writing speed for an SSD because it doesn’t have to worry about emptying and cleaning up blocks before actually writing data.
Joel Lee / IDG
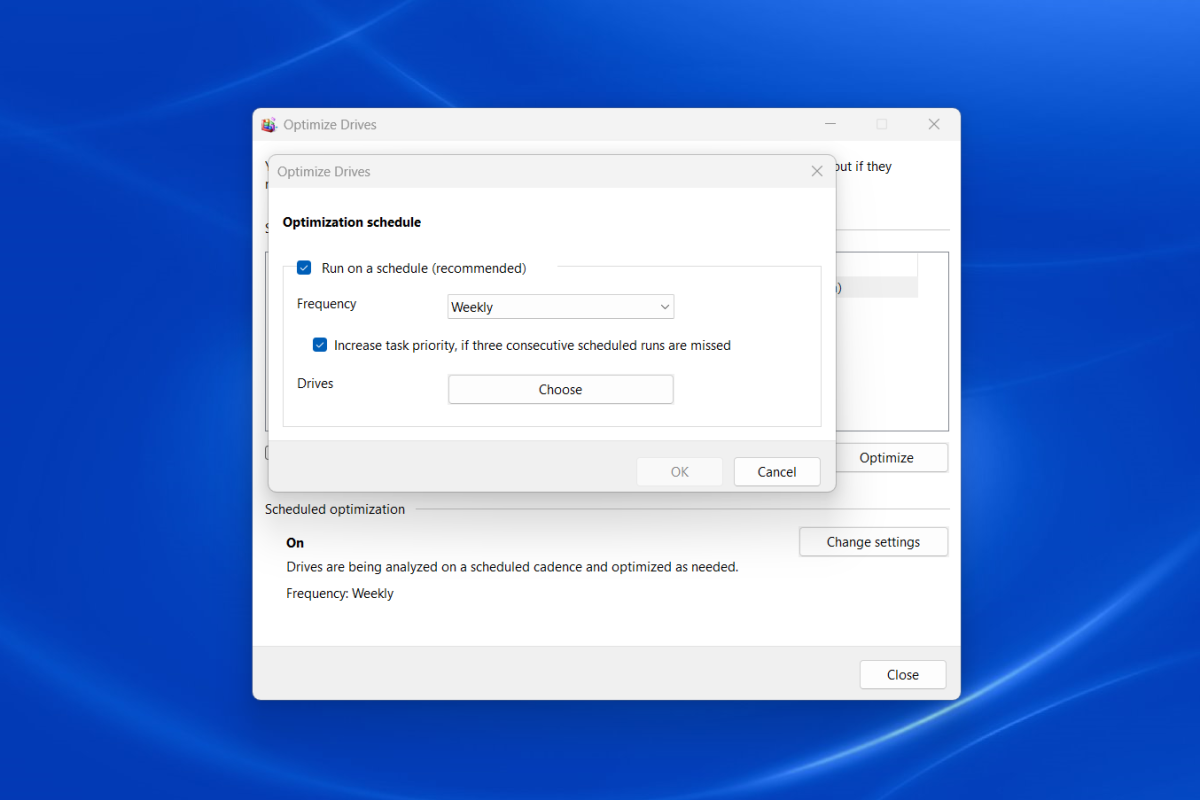
Fortunately, Windows makes it easy to schedule this optimization process for your SSDs. Open the Start menu and search for Defragment and Optimize Drives, then select it to launch it.
In the subsequent Optimize Drives window, you’ll see all your system drives under Status. Each individual drive can have its own separate optimization schedule.
To set a schedule for a drive, select the drive and then click the Change settings button at the bottom right. Make sure the checkbox for Run on a schedule (recommended) is enabled, then select a frequency. (Weekly is default, but you can also choose Daily and Monthly.)
4. Use DirectStorage when gaming
If you have several SSDs installed in your Windows 11 system, you can increase gaming performance by favoring an ultra-fast NVMe SSD for gaming. Microsoft calls this technology DirectStorage.
Without DirectStorage, a game’s data has to be loaded into RAM and then unpacked by the CPU before being copied to the GPU. With DirectStorage, the GPU can take the data directly from the NVMe drive and RAM, significantly reducing load times and latency.
DirectStorage is usually enabled by default, provided the operating system has correctly recognized the M.2 memory module and the SSD supports the NVMe protocol (Non-Volatile Memory Express). But you should check if it’s enabled just to be sure.
Joel Lee / IDG
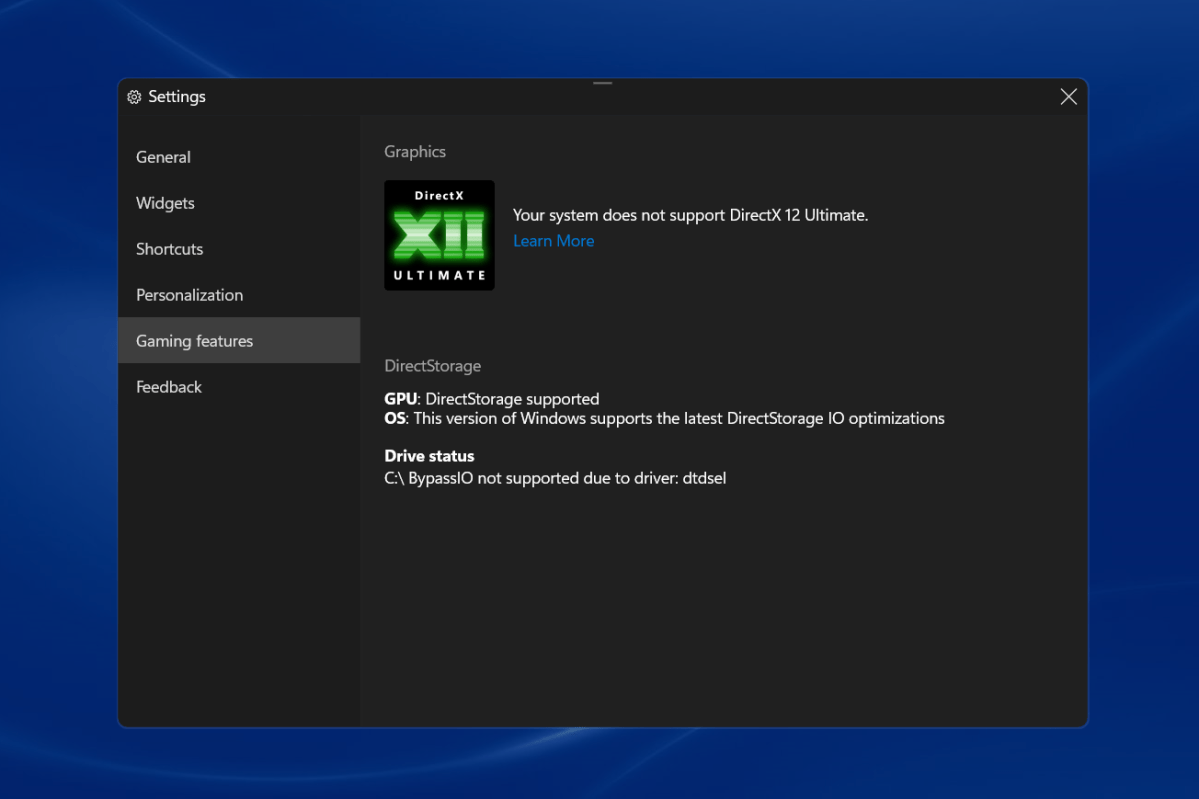
The easiest way to check whether Direct Storage is working correctly with your NVMe SSD is to switch into Windows’ integrated gaming mode. You can do this with the Windows key + G keyboard shortcut.
Once in gaming mode, click the gear icon in the top bar to access settings, then click Gaming features in the navigation. Here you’ll see info about DirectStorage — whether your GPU and OS support it, as well as which drives are compatible.
5. Prevent sleeping and clocking down
When you do nothing on your PC or laptop, it will eventually switch to energy-saving mode — and when that happens, the internal SSD also switches to sleep mode after a while.
Later, when you come back to resume your computer activity, the SSD needs to wake up before it can do anything. It takes a few seconds for that to happen, which doesn’t sound like a lot of time, but it can definitely add up… and if it happens often, it can be annoying.
To prevent the SSD from going to sleep, you can tweak the power plan settings in Windows. The drawback to doing this, though, is that the SSD is always drawing power because it’s constantly on.
Joel Lee / IDG
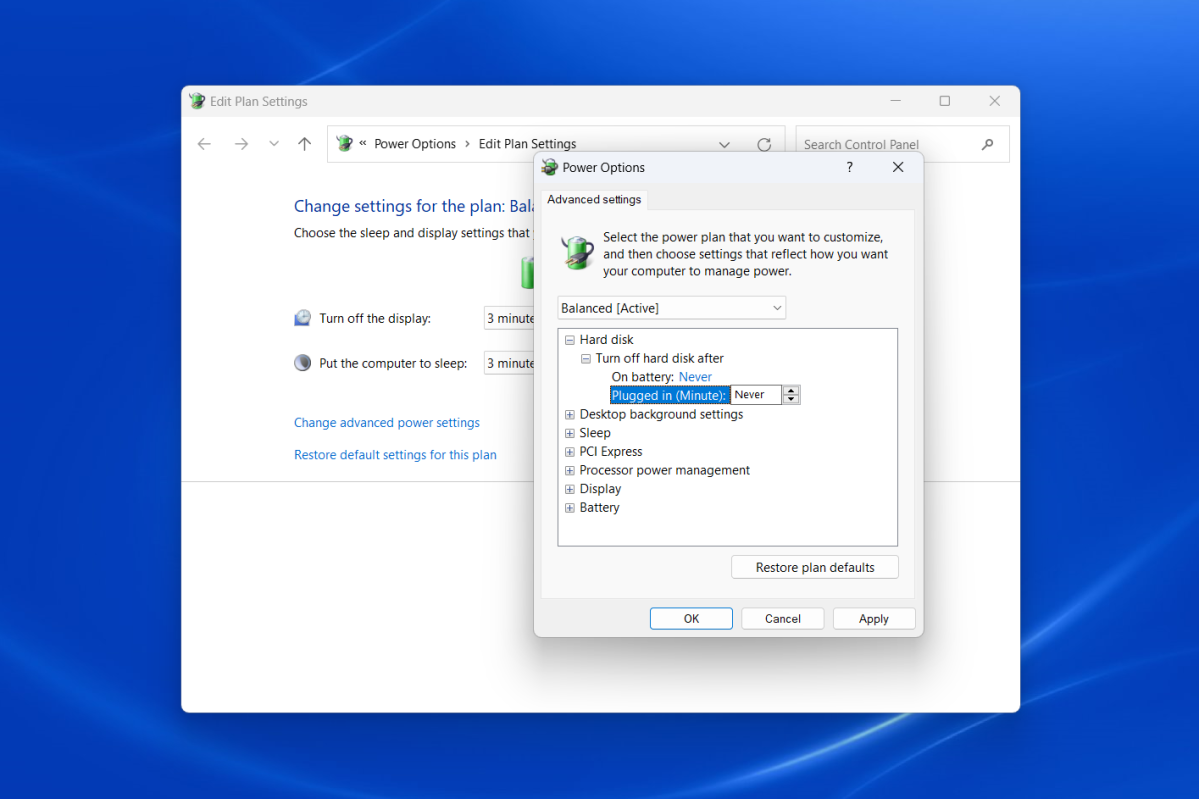
To make this change, open the Start menu and search for Edit power plan, then select it to open the corresponding page in Control Panel. Alternatively, you can directly open Control Panel and navigate to System and Security > Power Options > Change plan settings.
Here, click on the Change advanced power settings link. In the subsequent Power Options window, open the Hard disk item, then open the Turn off hard disk after item. Change the value to 0 or Never for both battery and plugged-in settings.
You can also open the PCI Express item, then open the Link State Power Management item, and change the value to Off for both battery and plugged-in settings. This prevents the PCIe bus from clocking down and reducing SSD performance; in other words, it minimizes SSD latency at the expense of increased overall power consumption. (On laptops, you may want to compromise with Moderate power savings.)
6. Improve cooling with a heat sink
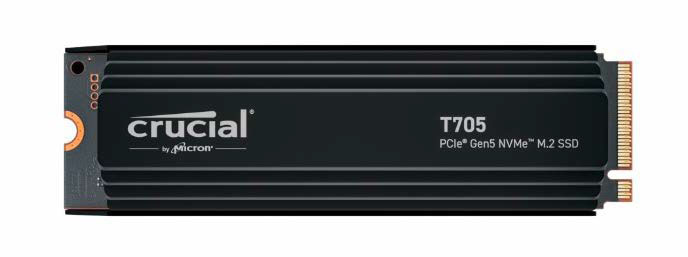
An SSD that’s too hot will reduce performance. That’s why more and more SSD models are coming with heat sinks now, and many motherboards also have a heat sink in the M.2 slot.
If the airflow in the computer is good, you don’t need extra cooling for your SSD. However, if you notice that your NVMe SSD often runs above its intended operating temperature, then it might be a good idea.
For most M.2 SSDs, the recommended operating temperature is between 32°F (0°C) and 158°F (70°C). You can check this using your drive manufacturer’s support tool, which usually shows all of the drive’s out-of-the-box specifications.
IDG
Whether your SSD requires extra cooling also depends on its PCIe version. The higher the PCIe version, the faster it operates and the more heat it generates. For this reason, most manufacturers generally recommend a heat sink for the latest PCIe 5.0 SSDs and often offer these models with heat protection included. You’ll typically see fanless designs made of aluminum or copper, which are equipped with heat-conducting pads on the underside and rest on the flash modules.
These passive coolers can also be easily retrofitted for minimal investment. Expect to pay between $5 to $20 for one. (Before installing, make sure there’s enough space in the height of your PC case.)
In the end, the decisive factor in SSD cooling is how your SSD is used on a day-to-day basis. In everyday Windows use, you probably don’t utilize the full performance potential of your SSD because you aren’t performing many random accesses (Input/Output Operations per Second, IOPS) of simultaneous tasks (Queue Depth).
According to internal studies by Intel, most Windows applications remain below a queue depth of three. This even applies to Windows startup, where hundreds of small files have to be loaded. For comparison, the full performance potential of an SSD is around ten times the queue depth, which only happens with very demanding tasks like video editing.

