More security, more features, and easier to expand your ‘home lab’ — not to mention how much you can learn about networking.
Do you like fiddling with computers and fancy the idea of taking on a more advanced project? Then I have a suggestion: Build your own router/firewall.
With a router running a more advanced operating system on more powerful hardware than standard consumer routers, a whole world of new possibilities opens up. Although there is a learning curve and can feel complicated at first, it actually becomes easier to do things that might be possible with a router from, for example, Asus, but are really complicated.
There are a number of operating systems to choose from, from Openwrt, which can also be installed on consumer routers, to various Linux-based systems such as Clear OS and IP Fire, to Unix systems such as PF Sense and Opnsense.
Anders Lundberg
The latter two seem to be the most popular, and I myself have had a router with Opnsense for a couple of years so for this guide I have chosen that system.
Why build it yourself?
For many, it’s enough to answer: Because it’s possible and because it’s interesting and instructive. But you don’t have to be motivated by curiosity alone. There are several practical and technical advantages too.
Once you get started and learn the basics, it immediately becomes much easier to do things like set up multiple VLAN with different firewall rules (to prevent smart home gadgets from accessing the internet, for example), use dynamic DNS, run your own recursive DNS server, display a welcome message when guests connect to the wireless network, and much more.
Perhaps the biggest benefit, however, is security. Instead of relying on the manufacturer to release updates and keep the router secure, you get new updates almost weekly so that all parts of the system have the very latest security fixes. There are also add-ons that give the network more advanced protection than is normal in consumer products.
Hunsn
Choose the right hardware
You can reuse an old computer for Opnsense, in which case one or two network cards are all you normally need to buy. But such a computer is usually unnecessarily power hungry and a large piece of equipment that can be difficult to place in the home.
Opnsense is based on the Unix system Freebsd. This means that it is a little more fussy with the hardware compared to Linux. Above all, it is network cards that can be a problem. The system prefers and works best with Intel-based cards, so if you’re buying new, it might be worth checking that the computer you choose has Intel networking chips.
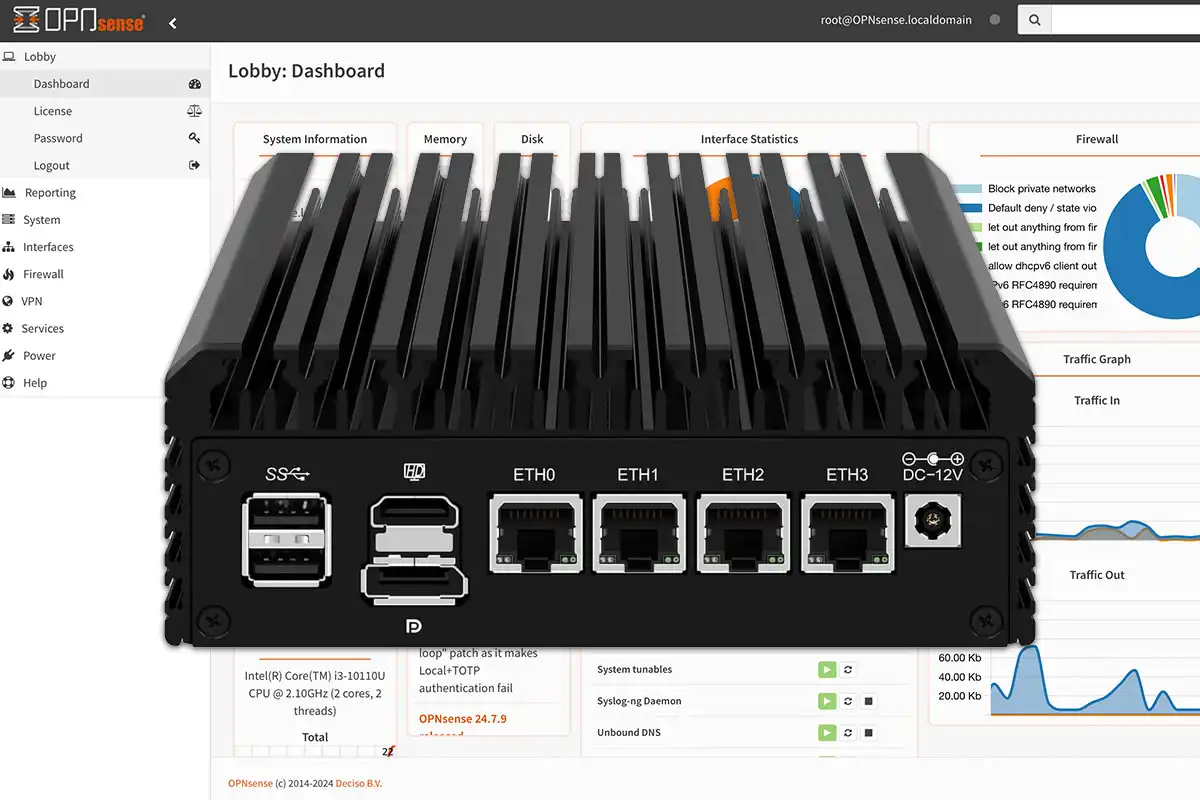
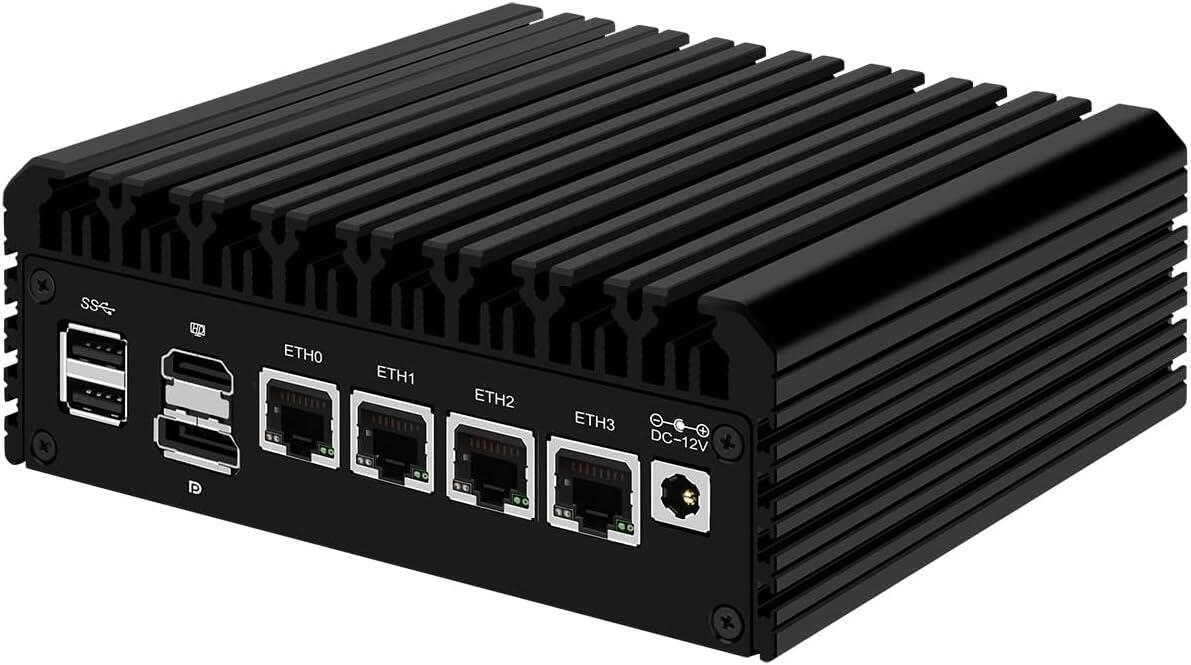
A mini PC with two Ethernet connectors may be a better choice, and in fact there are computers on sale designed specifically for use with Opnsense or PF Sense. For example, Amazon sells this model from Hunsn that costs just over $200 and has Intel networking chips. Since memory is cheap, I recommend 16 gigabytes from the start and at least 128 gigabytes of SSD.
In addition to the router computer, I strongly recommend a managed switch to connect, for example, your old router that you can set to work as an access point instead of a router, only for Wi-Fi. It is also needed if you want to start using virtual networks (VLAN).
Installing Opnsense
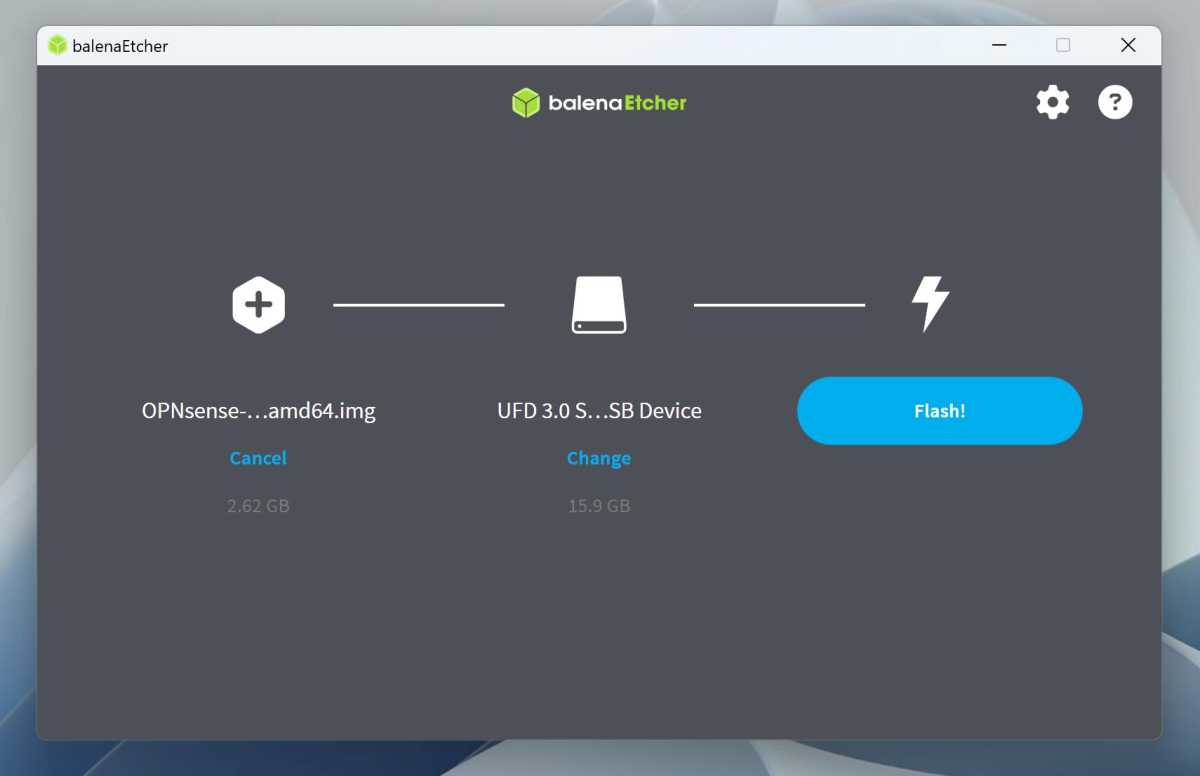
Start by downloading the latest version of Opnsense (click directly on the Download button with the preselected options). Also download and install Balena Etcher, a simple program for writing .iso and .img files to USB sticks.
Foundry
Unzip the downloaded .bz2 file so that you get an .img file. Plug in a USB stick, start Etcher, click on Flash from file and select that file. Select your USB stick as target and then click on Flash.
Once that’s done, you can eject the flash drive and connect it to the router computer, to which you’ll need to have a monitor and keyboard connected to begin with. Boot the computer from the USB stick via the boot menu or BIOS.
Foundry
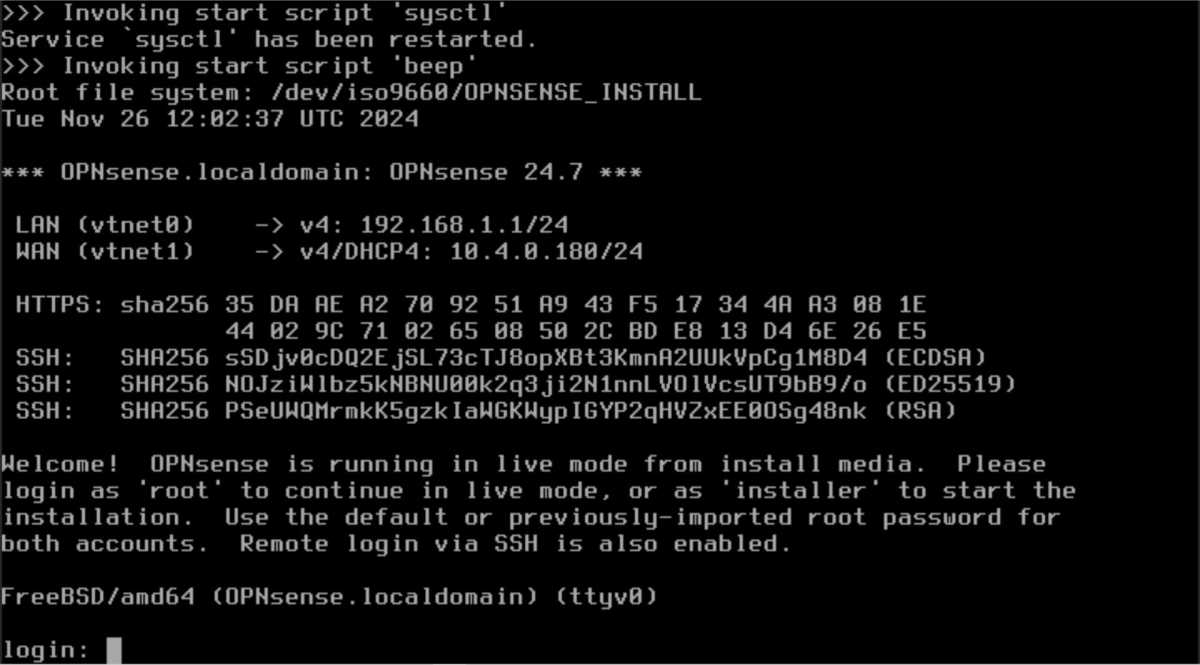
The system starts with text only, which will scroll past for a while. When it is finished, you will be taken to a login prompt. Enter username installer and password opnsense. The installation program will now start.
Foundry
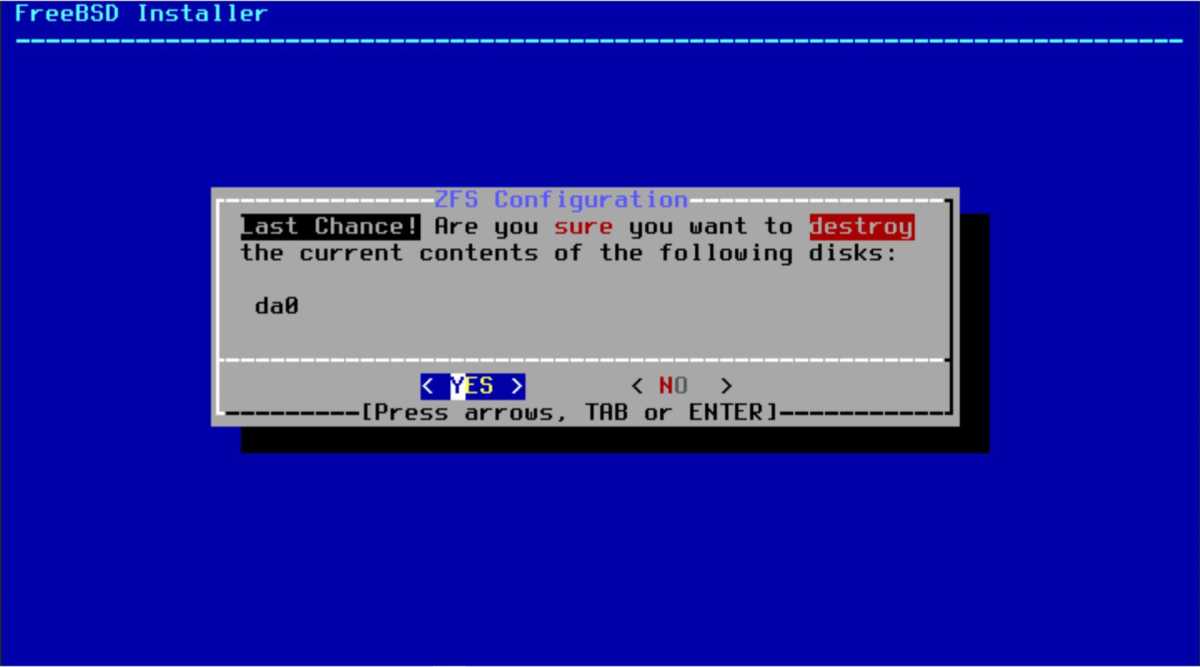
Select the language on the keyboard and move on. Select Install (ZFS) which is now the normal recommended method. Select Stripe and then use the space bar to select the target SSD. Go ahead and accept and it will format the disk and copy all the files. Once it’s done, you can select Complete Install (you can change root password easier in the next step).
Basic settings
When the router computer reboots, you can take out the USB stick and let it boot from the SSD. As before, a bunch of text will scroll by during boot, until you reach the login prompt.
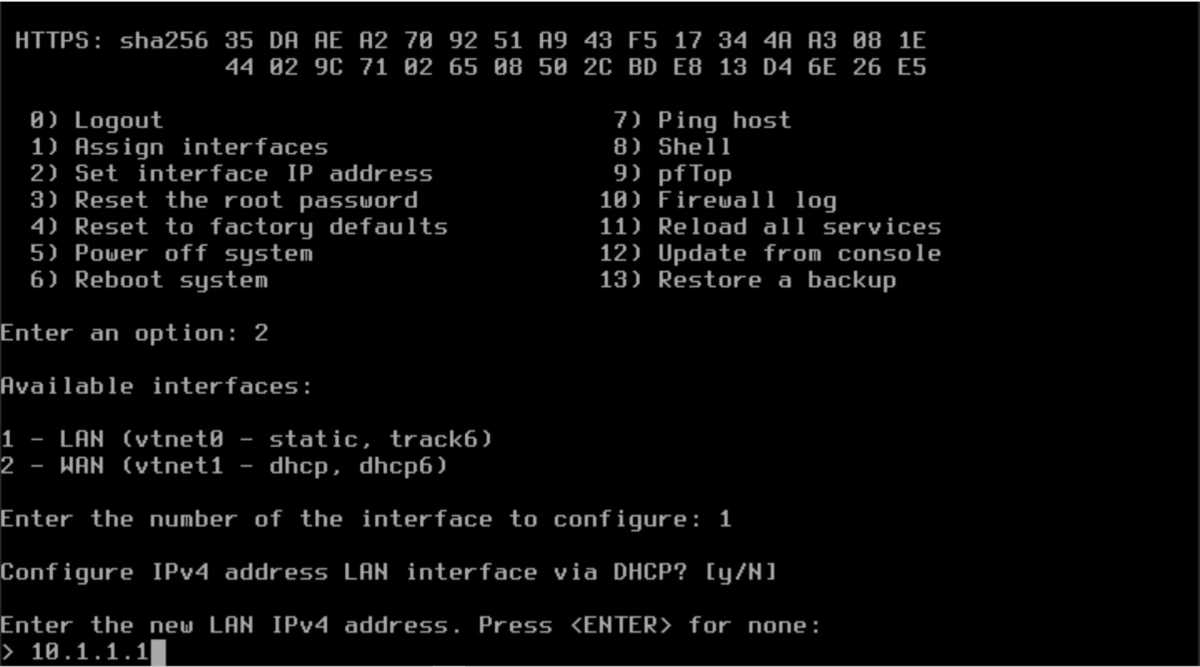
I recommend that you start by changing the address of the LAN interface, so that Opnsense doesn’t mess with your old router if you want to be connected to both at the same time before you are ready to move the internet connection over to Opnsense.
Foundry
Log in with the username root and the password opnsense. Press 2 to change the IP address. Press the correct number for LAN (normally 1). Press return to choose not to use DHCP. Enter an appropriate address, for example 10.1.1.1, and then 24 to stick to addresses in the format 10.1.1.x. On the rest of the questions you can press return to accept the preselected option.
Before you can do anything else, you need to connect the Opnsense machine and your regular computer with a network cable, either directly or via a switch.
Open Settings on your regular computer and go to Network and Internet > Ethernet. You should have an address in the same format as Opnsense (for example 10.1.1.2), with the address you just chose as gateway and mask 255.255.255.0. If it has not appeared by itself, you can click on Edit to the right of IP assignment and fill in yourself.
Then open a browser and type in 10.1.1.1 and you should hopefully get a security warning about invalid certificate, which you have to click past to get to the Opnsense web interface. The username is root and the default password is opnsense.
Foundry
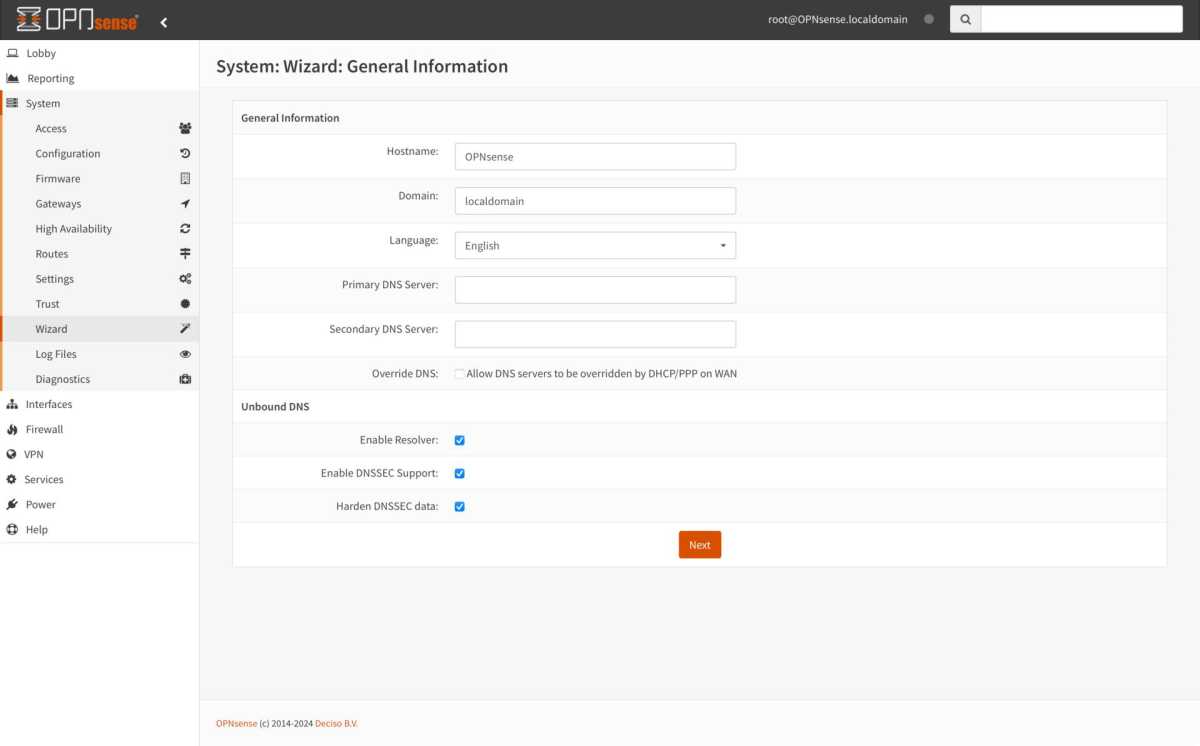
You will now be taken to the Opnsense guided basic settings. The first thing to do is DNS settings. Here I recommend leaving the dns servers fields blank, untick Override DNS and tick the three boxes under Unbound DNS.
The remaining steps you can click past until you get to a question about changing the password for the root account. Choose a new secure password and write it down.
Get on the internet
In order for Opnsense to access the internet and act as a router/firewall, you need to connect an Ethernet cable to it. You can either take the cable from the broadband socket of your old router and connect it to Opnsense instead. Alternatively, you can connect to a socket in the old router or a switch if you have one, but this will be a bit more complicated.
If you have regular broadband via fiber that connects with DHCP, Opnsense should automatically connect and get an external IP. You can check this by selecting Interfaces > Overview in the web interface.
Foundry
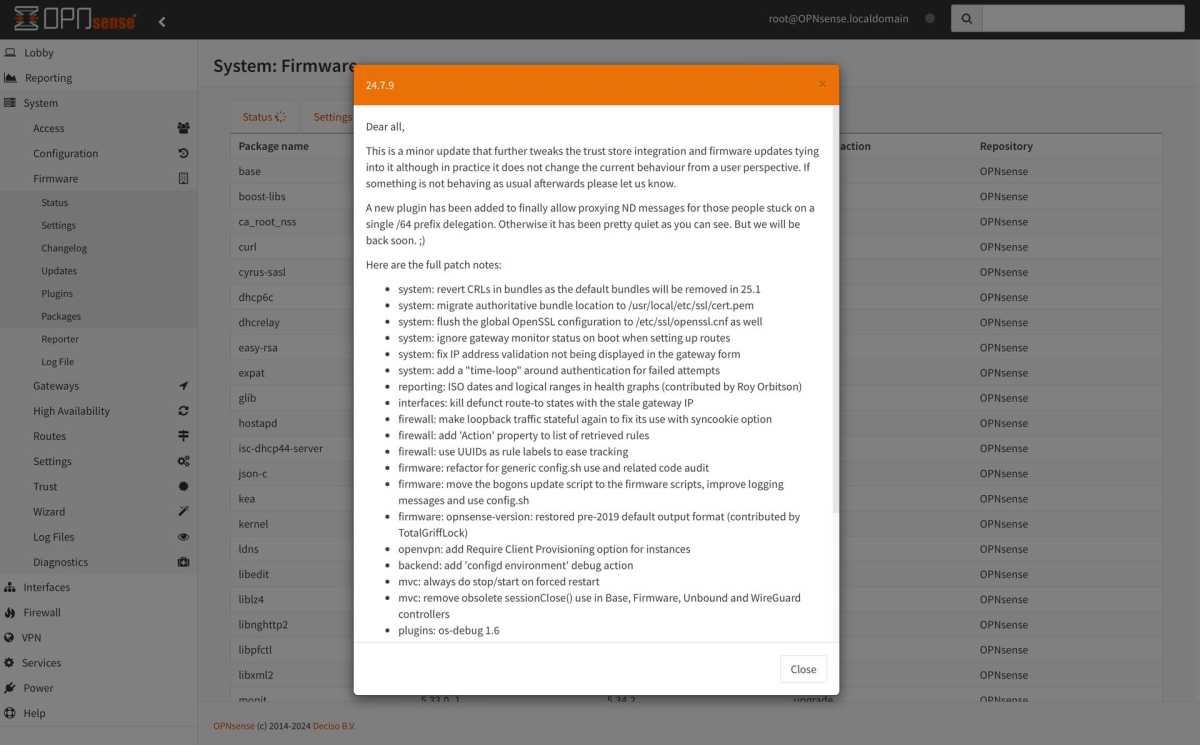
If the WAN has been given an address, you can test that everything works by checking for updates. Select System > Firmware > Status and click Check for updates. If it works, this is a good time to install the first of many upcoming updates.
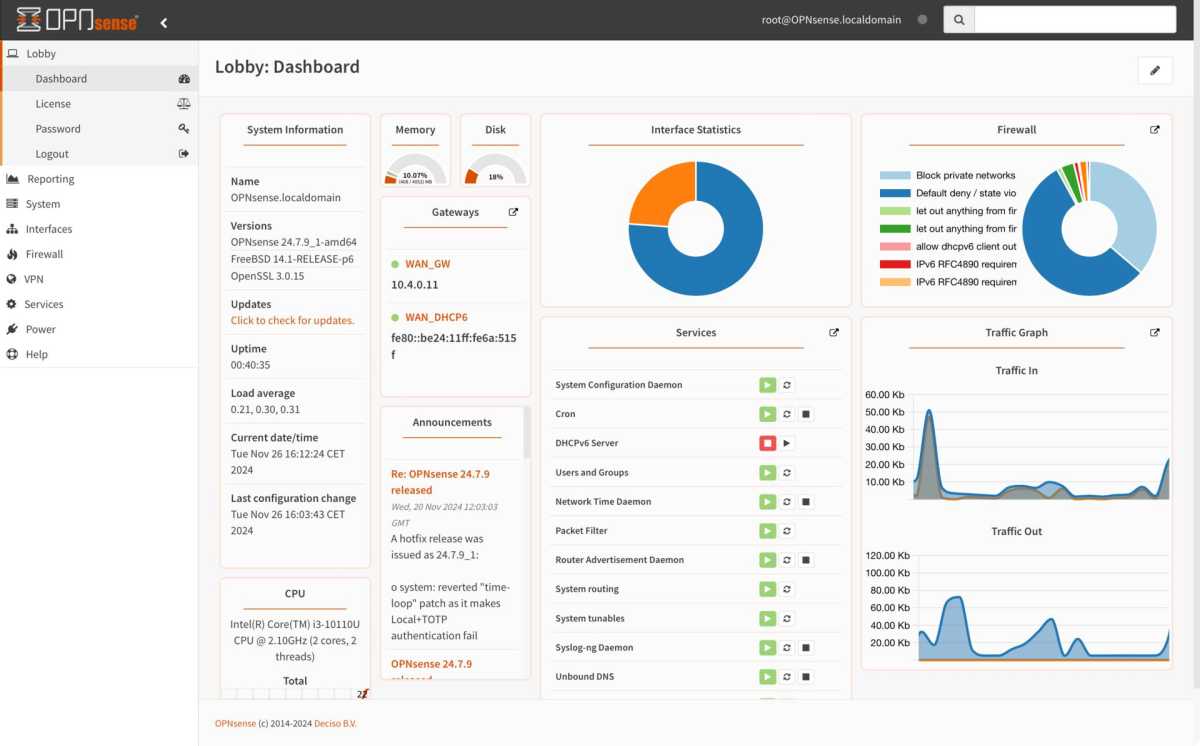
Then try going to any website in your regular computer. If that works too, you have a working Opnsense router. Other settings in the system can be left as they are for now — the system has no unsafe default options.
Foundry
Learn the interface and understand the firewall
The Opnsense web interface is structured a little differently than most routers. On the left, there’s a hierarchical menu where you’ll find all the settings, divided into different categories. At the top right, there is also a search bar that works really well to find settings far down in the hierarchies.
The System menu mainly has settings for Opnsense itself, but also updates and installation of plugins — an important feature when you want to start building out the router with smart features.
Interfaces is about the different network interfaces, normally LAN and WAN but here you will also find VLAN, PPPoE if the internet operator requires login and interfaces for a VPN server.
Firewall is, of course, about rules for blocking and allowing traffic, but also about port forwarding. Under Aliases, you can create aliases for individual devices, for example, to make them easier to use in firewall rules.
The VPN menu is for both VPN servers for connecting from outside to your local network and for connecting the entire network to an external VPN service.
Services is a collection menu for other built-in functions such as DHCP and DNS (Unbound) and also functions from installed plugins.
VLAN without internet for the smart home
A common use case for a more advanced router like Opnsense is to place some connected devices on a separate network with different firewall rules. For example, a network for smart home gadgets that have no access to the internet and limited access to the rest of the network.
Foundry
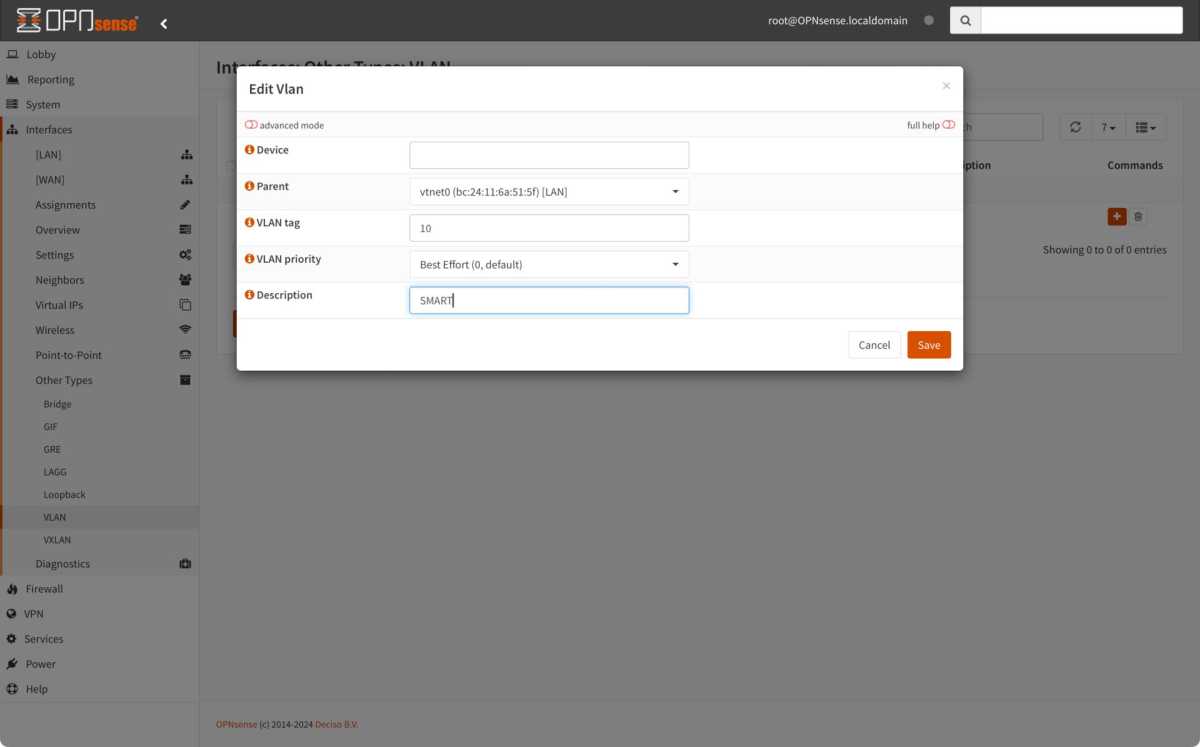
To do so, start by opening Interfaces > Other Types > VLAN. Click on the plus button to create a new VLAN. Give it a short name, for example SMART and fill in a number for the VLAN tag between 1 and 4,094, I usually choose a ten, for example 10. Save.
Flundry
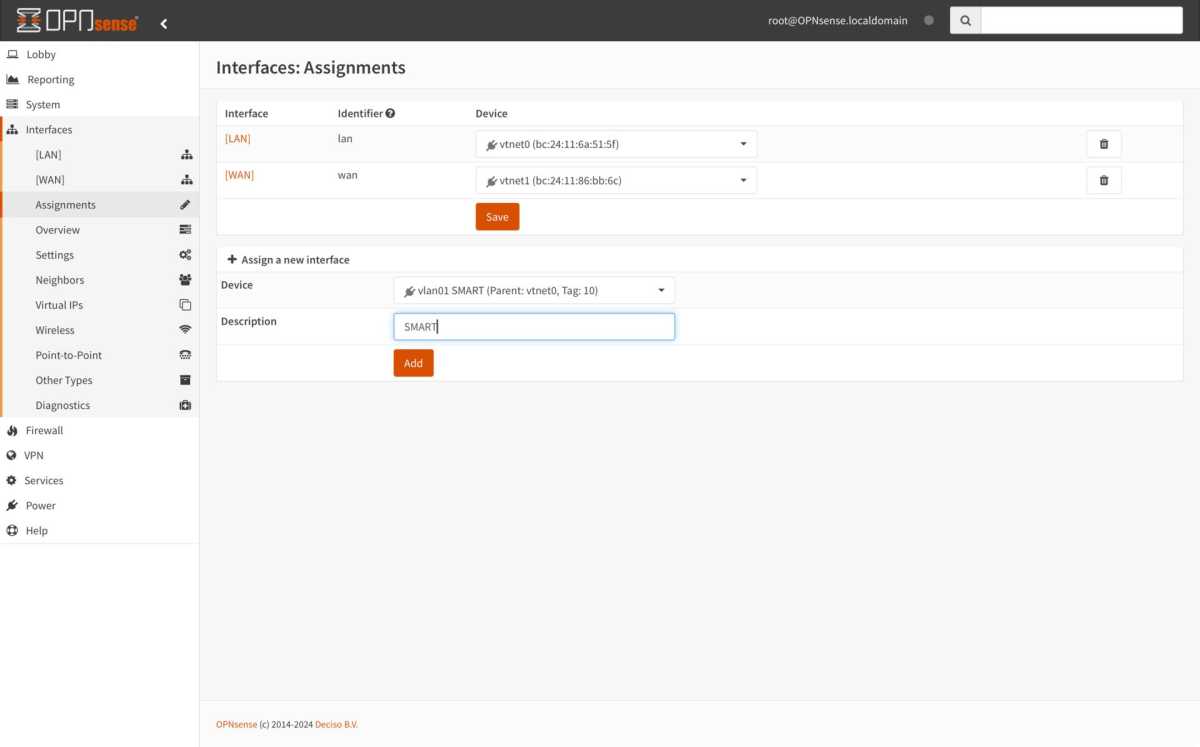
Now go to Interfaces > Assignments and fill in the same name under Description for the new interface. Click Add.
Foundry
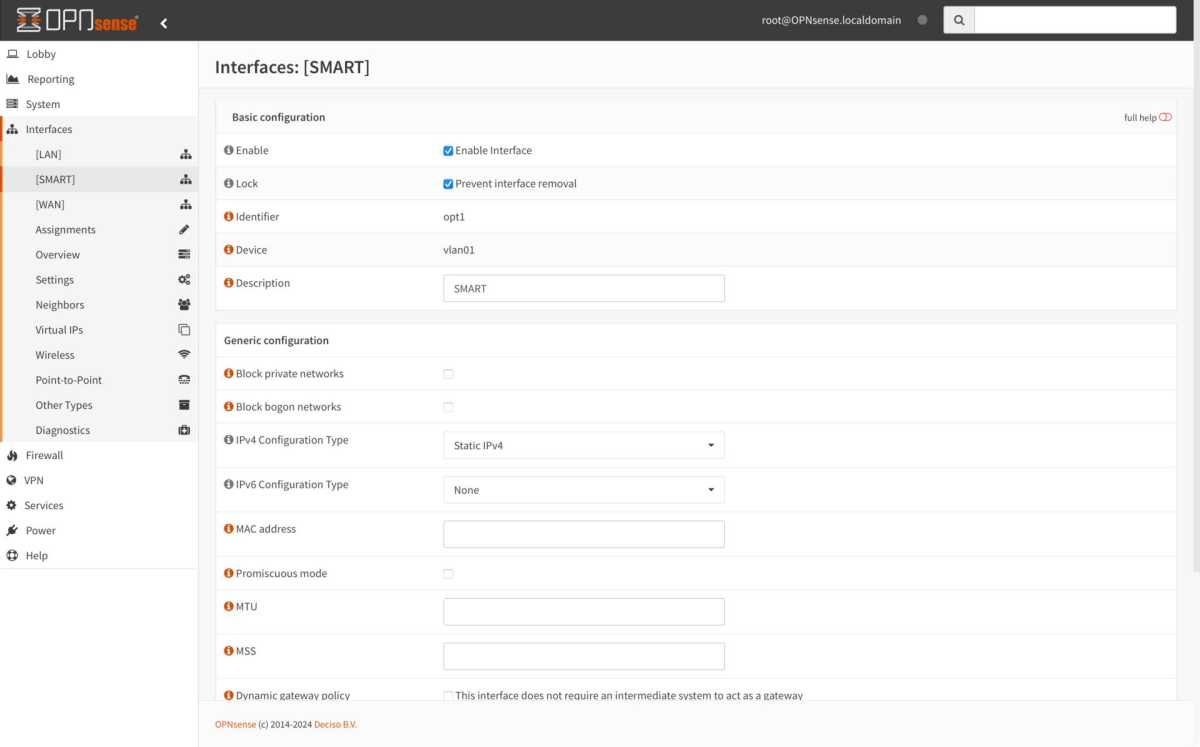
Now click Interfaces > [SMART] and tick Enable Interface and Prevent interface removal. Select Static IPv4 under IPv4 Configuration Type. Scroll down to the bottom and fill in a suitable IP address and select 24 instead of 32 to the right of the address. If you have chosen to give the regular network the address 10.1.1.1, you can choose 10.1.10.1 for the VLAN network (I usually use the same number in the third group as the VLAN tag, so a guest network with the tag 20 gets the address 10.1.20.1 and so on). Save and apply the changes.
Foundry
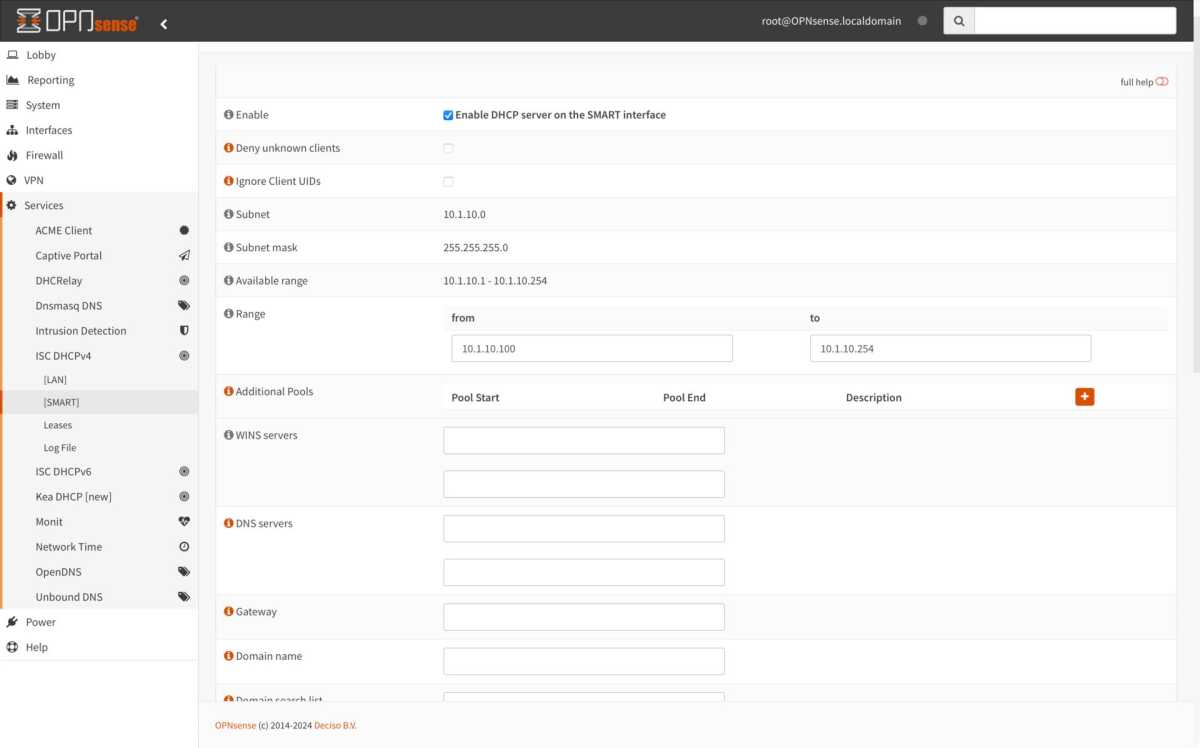
Go to Services > ISC DHCPv4 > [SMART]. Tick Enable DHCP server… and fill in an address range, for example 10.1.10.100-10.1.10.254 (I usually leave addresses below 100 for devices that should have a fixed IP address). Save and apply the changes.
If you look in Firewall > Rules > SMART you will see that there are no rules, which means that all traffic is stopped. If you look at the rules for the LAN, you will see that Opnsense has automatically added rules to let through all traffic originating on that network. So if you want to allow internet for smart home gadgets, you need to create a rule for that.
Foundry
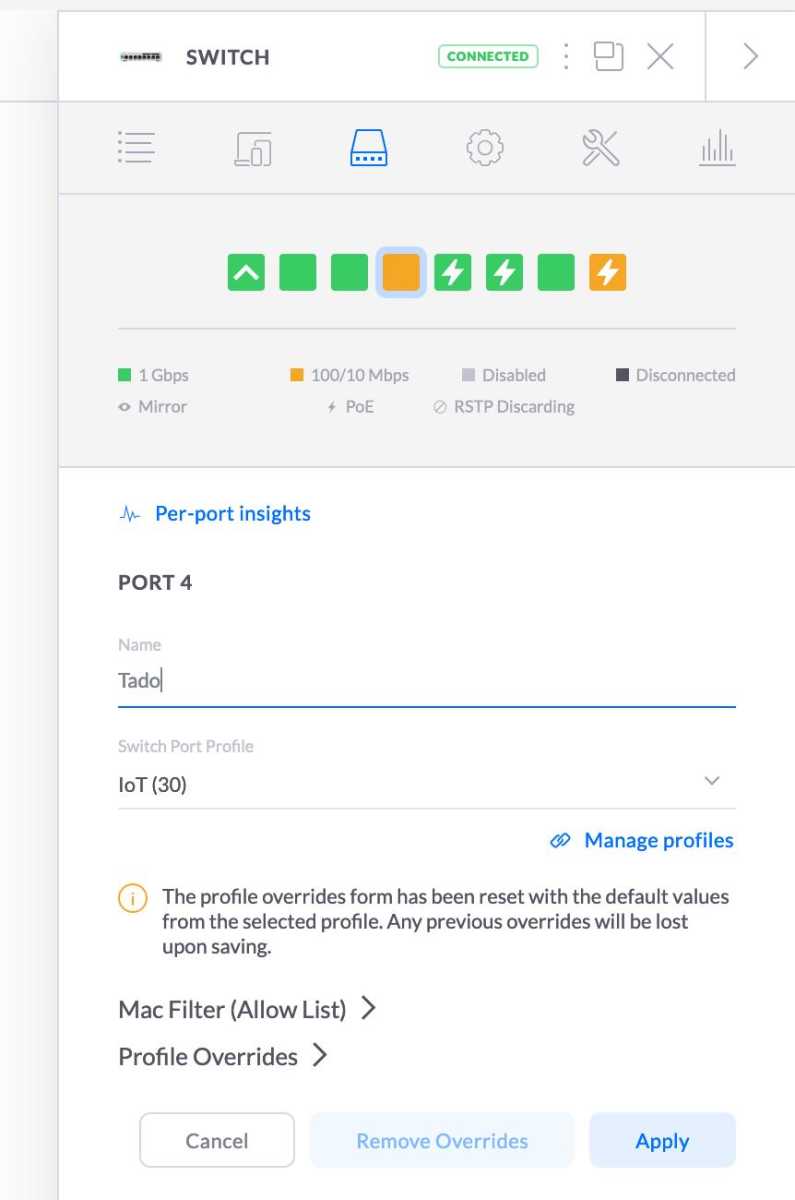
To actually use and connect gadgets to the VLAN network, you need a managed switch. In its settings, you can enable VLAN tagging for one or more ethernet connectors, and gadgets you connect to these connectors will then only “see” the VLAN network. In the adjacent image, you can see what it looks like with a switch from Unifi — other manufacturers such as D-Link and TP-Link have similar settings. If your Opnsense machine has more network connectors, you can “tag” these and use them instead.
Do you need help?
If you get stuck somewhere, there are many resources to help. The Home Network Guy blog has several guides on Opnsense, from installation to more advanced topics like VLAN. It also has a very good YouTube channel that I highly recommend. On Reddit, help is available in several groups, such as r/opnsense and r/homelab.

